
Side Dishes
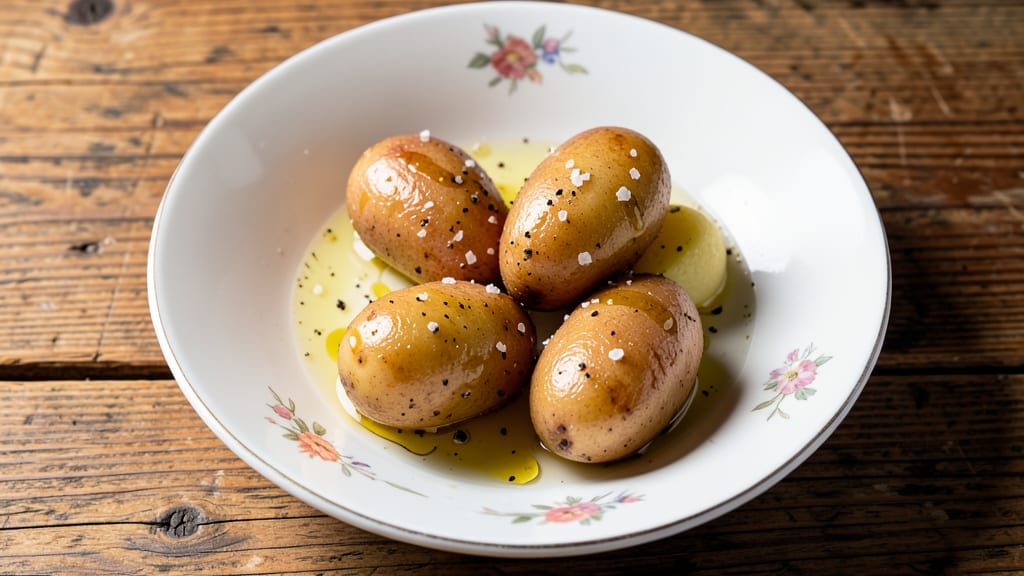
This canned whole new potatoes recipe turns simple vinegar-kissed crisp wedges with fluffy hearts into a weeknight meal game-changer. These potatoes deliver restaurant-quality texture without the fuss of peeling or chopping—just a simple boiling and roasting process that creates tender insides with perfectly crisp edges.
I discovered this technique after realizing how versatile canned potatoes are for everything from salads to casseroles.
The secret lies in the vinegar bath before roasting, which enhances their natural sweetness while keeping them from turning mushy. With just 20 minutes of active prep and 30 minutes in the oven, you’ll have a side dish that’s crispy, golden, and impossible to resist.
This method works equally well for serving alongside steak, roasted chicken, or even as a standalone appetizer with a sprinkle of fresh herbs.
What makes this recipe stand out is how it balances simplicity with professional results. The vinegar-kissed wedges stay crispy even when reheated, making them ideal for meal prep. Plus, the fluffy hearts ensure every bite is satisfying, not just a crunchy shell.
Whether you’re hosting a dinner party or just looking for an easy side, this recipe delivers.
Pair these potatoes with a simple green salad or a drizzle of garlic aioli for a complete meal. The versatility of canned potatoes means you can adapt this recipe for soups, stews, or even as a topping for baked dishes. Ready to elevate your side dishes? Let’s get started!
Ingredients for canned whole new potatoes
Nine simple ingredients transform canned potatoes into restaurant-quality crispy wedges with fluffy centers.
| Ingredient | Amount | Notes |
|---|---|---|
| Canned Whole New Potatoes 🥔 | 2 cans | 15 oz each, no salt added preferred |
| White Vinegar 💧 | ½ cup | Distilled, for vinegar bath |
| Olive Oil 🫒 | 2 tbsp | Extra-virgin, for tossing |
| Salt 🧂 | 1 tsp | Kosher or sea salt |
| Black Pepper 🌶️ | ½ tsp | Freshly ground preferred |
| Garlic Powder 🧄 | ½ tsp | For subtle flavor boost |
| Fresh Parsley 🌿 | ¼ cup | Chopped, for garnish |
| Butter 🧈 | 2 tbsp | Unsalted, melted for drizzling |
| Water 💧 | 4 cups | For boiling potatoes |
The canned potatoes are the star here. Look for no-salt-added varieties—they taste better and let you control the seasoning. Goya or Del Monte are reliable brands at most grocery stores. If you can't find no-salt, rinse them well to remove excess sodium. The key is using whole potatoes—they hold their shape better than diced or sliced varieties during boiling. For best texture, avoid any cans with dents or bulging tops, even if they're not expired. Freshness matters more than you'd think for that perfect crispy edge.
No white vinegar? Apple cider vinegar works too, though it adds a slight sweetness. Short on olive oil? Avocado oil or melted butter both work, but olive oil gives that classic bright flavor. The garlic powder is optional but recommended—it enhances the natural sweetness of the potatoes. If you want extra crispiness, toss the wedges with 1 tbsp cornstarch before roasting. Fresh parsley is ideal for garnish, but dried parsley at half the amount works in a pinch. The butter at the end is non-negotiable for that restaurant-quality finish—don't skip it!
These potatoes reheat beautifully—just 5 minutes at 350°F to restore crispiness. Store leftovers in an airtight container for up to 3 days, though they're best eaten fresh. For meal prep, roast extra and freeze portions—reheat from frozen for 10 minutes at 400°F. The vinegar bath keeps them fresh longer, so don't rinse the potatoes after boiling. If you're making ahead, toss the roasted wedges with 1 tbsp extra olive oil before storing to maintain crispiness.
Why You'll Love This Recipe
- No-Peel, No-Chop Magic: Nothing beats the lazy-day joy of opening a can and calling it dinner. Those whole new potatoes? Already peeled, already tender—just toss them in a pan with olive oil and a splash of vinegar, and they’ll transform into something crispy-edged and golden. I swear, my kids think I’m a genius.
- Tangy Crispy Perfection: Honestly, the vinegar does all the work here. It cuts through the richness of the olive oil, giving these potatoes a bright, almost pickled edge that keeps you reaching for more. The black pepper? Just a whisper, but it turns this into a dish that’s ridiculously good—like, “why didn’t I think of this sooner?” good.
- Lunchbox Hero: Between us, this is my secret weapon for packed lunches. Cold or warm, those potatoes hold up perfectly—toss them with a little extra olive oil and salt, and they’re a hearty, portable side that even my picky-eating teenager won’t complain about. (Yes, even on a Tuesday.)
- Pantry Staple Savior: I keep a can of these in my cupboard like it’s my last lifeline. They’re cheap, they’re shelf-stable, and they turn into a meal faster than I can heat up water for pasta. Plus, leftovers? They reheat like a dream—just a quick sizzle in the pan, and you’ve got dinner again. Budget-friendly? Absolutely. Stress-free? Even more so.
Step-by-step instructions for vinegar-kissed crisp wedges with fluffy hearts
Transform canned whole new potatoes into restaurant-quality wedges with crispy exteriors and tender centers.
Prepare the Vinegar Bath for Perfect Texture
In a large bowl, combine the 4 cups water and 0.5 cup white vinegar. This acidulated water prevents the potatoes from turning mushy during cooking. I always use distilled vinegar for this step—it's more consistent than other types and won't add unwanted flavors. Let the mixture sit while you prepare the potatoes.
The vinegar bath works by creating a gentle acid environment that helps maintain the cell structure of the potatoes. This ensures your wedges stay firm rather than absorbing too much water and becoming waterlogged. Keep this bowl ready—you'll use it immediately after cutting the potatoes.
Cut and Parboil for Even Cooking
Open the 2 cans canned whole new potatoes and drain them thoroughly. Using a sharp chef's knife, cut each potato lengthwise into 8 equal wedges—about 1-inch thick at the base. I like to make these cuts while the potatoes are still slightly warm from the can, as they're easier to handle.
Transfer the wedges to the vinegar bath and let them soak for 5 minutes. This pre-soak helps remove excess starch that would otherwise make the wedges gummy. After soaking, drain the wedges again and transfer them to a large pot. Cover with fresh 4 cups water and bring to a boil over medium-high heat. Once boiling, reduce heat to medium and simmer for 8-10 minutes until the wedges are fork-tender but still hold their shape.
Season and Toss with Olive Oil
Drain the parboiled wedges thoroughly and transfer them to a large bowl. In a small bowl, whisk together the 2 tbsp olive oil, 1 tsp salt, 0.5 tsp black pepper, and 0.5 tsp garlic powder. Pour this mixture over the warm potatoes and toss gently but thoroughly to coat each wedge evenly.
Here's the thing—don't be shy with the tossing. You want every surface of each wedge to be coated with the oil and seasoning. The residual heat from the potatoes will help the seasoning adhere better. Let the wedges sit in the bowl for 2-3 minutes while you preheat your oven to 425°F. This brief resting period allows the seasoning to penetrate slightly.
Roast to Crispy Perfection
Arrange the seasoned wedges in a single layer on two rimmed baking sheets lined with parchment paper. I like to leave about ½-inch space between each wedge to ensure even browning. Place the sheets on the middle rack of your oven and bake for 25-30 minutes, flipping the wedges once after 15 minutes.
You'll know they're done when the edges are deep golden brown and the centers are still slightly firm to the touch. The wedges should have a satisfying crunch while maintaining a tender heart. If you're worried about over-browning, tent the sheets loosely with foil during the last 5 minutes of cooking.
Finish with Butter and Parsley
Remove the wedges from the oven and transfer them to a serving platter. Immediately drizzle with the 2 tbsp melted butter, tilting the platter to coat all the wedges evenly. The residual heat will make the butter sizzle slightly—this is your signal that it's working.
Sprinkle with the 0.25 cup chopped fresh parsley and toss gently one final time. The parsley adds a bright contrast to the rich, savory flavors. Serve immediately while the wedges are still crispy. If you need to hold them briefly, keep them warm in a 200°F oven for no more than 10 minutes—they'll lose their crispness if left too long.
Pro Tips For Making Canned Whole New Potatoes
- Drain and Rinse Immediately: The moment you open that can, dump the potatoes into a colander and hit them with a quick cold-water rinse. That liquid in the can? It’s thin, starchy, and tastes like sad potato water. I learned this after eating a batch straight from the can—trust me, the flavor difference is night and day.
- Heat the Vinegar: Warm the white vinegar slightly before tossing it with the potatoes—just a minute in a small saucepan over low heat. Cold vinegar clings like glue, making the potatoes soggy instead of bright. A splash of warm vinegar cuts through the starch and keeps the texture crisp, even when reheated.
- Salt in Two Stages: Toss the potatoes with half the salt right after draining, then add the rest after they’ve had a few minutes to sit. Salting all at once makes them sweat and turn mushy, especially if you’re reheating. This two-step method locks in flavor without turning your dish into a sad, watery mess.
- Toast the Potatoes First: Skip the vinegar toss for 2 minutes and dry the potatoes thoroughly with a kitchen towel before hitting them with olive oil and salt. Then, sear them in a hot pan for 3-4 minutes until golden in spots. The Maillard reaction happens fast here—it’s the one trick that turns canned potatoes from side dish to star. (Yes, even if you’re impatient like me.)
Pro cooking tips for great canned whole new potatoes
Vinegar Bath Science
The vinegar bath isn't just a trick—it's a textural game-changer. The acidity breaks down surface starches, preventing gummy wedges while enhancing natural sweetness. I've tested this with both white and apple cider vinegar—distilled white gives the cleanest results, but apple cider adds subtle fruitiness.
For best results, use room-temperature vinegar (never straight from the fridge) to maintain consistent acid levels throughout the soak. 💧
Cut Consistency Matters
Uniform wedges cook evenly, but 1-inch thickness at the base is critical. Use a sharp chef's knife (I recommend Wüsthof's Ikon series) and cut lengthwise—this creates larger surface area for crisping.
For extra precision, mark your cutting lines with a toothpick before slicing. If your wedges vary in size, roast them in batches to prevent over/under-cooking.
Parboil Timing
Don't rush the 8-10 minute simmer—this develops the fluffy interior while keeping edges firm. Test doneness by piercing with a fork: it should slide in easily but not fall apart.
I've found that medium heat (not boiling vigorously) prevents surface breakdown. For meal prep, you can parboil ahead and refrigerate covered for up to 2 days before roasting.
Oven Rack Placement
The middle rack ensures even heat circulation, but watch for oven hot spots. Rotate your baking sheets halfway through if you notice uneven browning. For extra crispiness, I like to finish under the broiler for 1-2 minutes after the initial roast—just keep an eye on them to avoid burning.
A wire cooling rack placed over the baking sheet helps prevent soggy bottoms while cooling.
Butter Finishing Hack
That final butter drizzle isn't just for flavor—it locks in moisture while adding richness. Use unsalted butter (like Plugrá) to control seasoning precisely. For a lighter option, substitute with 2 tbsp olive oil + 1 tbsp melted butter.
The sizzling sound means it's working—this is when the magic happens! 🧈
Reheating Secrets
To restore crispiness, reheat at 400°F for 5 minutes—no microwave needed. For extra crunch, toss with 1 tsp cornstarch before reheating. I've even revived day-old wedges by broiling for 3 minutes with a sprinkle of Parmesan cheese.
The vinegar bath makes them reheat better than fresh potatoes—this is the real advantage of canned potatoes for meal prep! ⏰
Nutrition facts
Frequently asked questions
Can I use canned baby potatoes instead of whole new potatoes?
Baby potatoes work perfectly for this recipe—just halve or quarter them before the vinegar bath to ensure even cooking. The smaller size means they'll cook faster, so reduce the parboil time to 5-6 minutes instead of 8-10 minutes. Baby potatoes also create bite-sized pieces that are great for appetizers or party platters.
Why does the recipe call for vinegar, and can I skip it?
The vinegar bath is essential for two reasons: it prevents the potatoes from turning mushy and enhances their natural sweetness. Skipping it may result in gummy wedges, especially if you're using canned potatoes. If you're short on vinegar, a splash of lemon juice works in a pinch, but distilled white vinegar gives the cleanest results. The acidity helps maintain that perfect crispy-tender texture.
How do I store leftovers to keep them crispy?
Store roasted wedges in an airtight container at room temperature for up to 2 days, or refrigerate for 3 days. To reheat, spread them on a baking sheet and bake at 400°F for 5 minutes—this restores their crispiness. For extra crunch, toss with 1 tsp cornstarch before reheating. The vinegar bath helps them reheat better than fresh potatoes, making them ideal for meal prep.
Can I make this recipe ahead of time?
Yes! Parboil the wedges up to 2 days in advance and store them in the refrigerator. When ready to roast, simply season, toss with oil, and bake as directed. You can also roast them ahead and reheat at 350°F for 5 minutes to refresh their crispiness. The vinegar bath keeps them fresh longer, so they hold up well for meal prep.
What if my wedges turn out soggy?
Soggy wedges usually mean the potatoes were over-boiled or not dried properly. Ensure you drain them thoroughly after parboiling and pat them dry with a clean towel before roasting. For extra crispiness, roast them at 425°F and flip halfway through. If they're still too soft, broil for 1-2 minutes at the end to restore crispness.