
Side Dishes
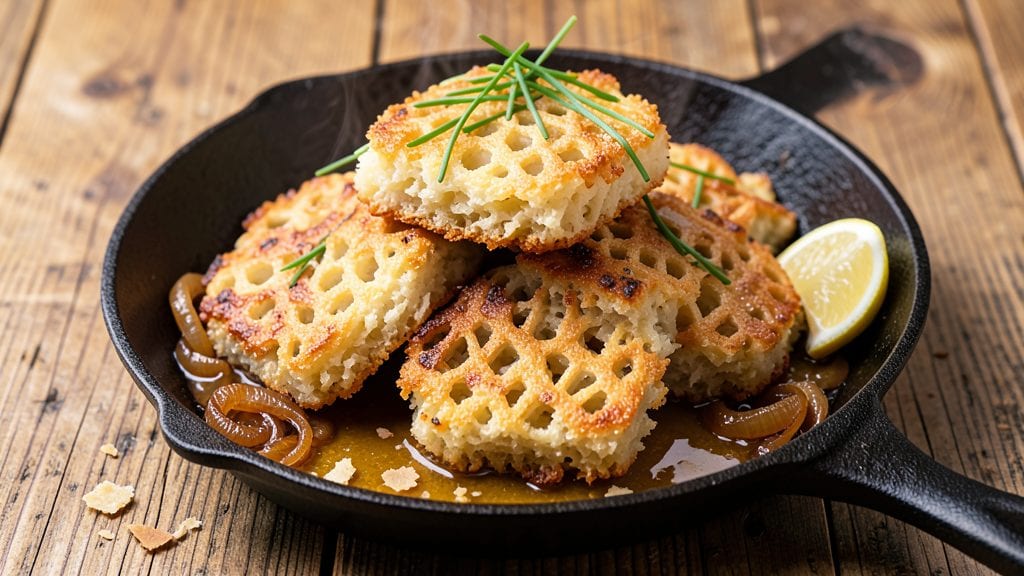
Grandma's potato latkes recipe delivers the crispy, golden comfort of a Jewish kitchen tradition that's been perfected through generations. The secret lies in freshly grated potatoes, onions, and a precise balance of flour and egg that creates that signature crispy exterior while keeping the inside tender.
I've been making these since I was a kid, and every batch reminds me of Friday night dinners with family.
What makes these latkes truly special is the technique—grating the potatoes by hand (no food processor!) and letting the mixture rest for 30 minutes before frying. This ensures the right texture: crispy on the outside, fluffy inside, with just enough golden-brown color to make your kitchen smell like home.
The onions add natural sweetness that caramelizes beautifully during frying, creating those irresistible crispy edges.
By the time you're done, you'll have a stack of golden latkes that are crispy enough to stand up to applesauce or sour cream without falling apart.
The aroma alone will bring everyone to the table, and the first bite delivers that perfect combination of textures—crunchy exterior melting into tender potato. This is comfort food at its finest, with a technique that's been tested and loved for decades.
Serve them with classic toppings like sour cream, applesauce, or a sprinkle of fresh herbs for a meal that feels both nostalgic and fresh. The beauty of latkes is how versatile they are—perfect for breakfast, brunch, or even as a side dish for holiday meals.
Let's get cooking with this timeless recipe that brings warmth to any table.
Ingredients for grandma's potato latkes
Freshly grated potatoes and onions make these latkes extra crispy and nostalgic.
| Ingredient | Amount | Notes |
|---|---|---|
| Russet Potatoes 🥔 | 3 lb | Freshly grated, skin removed |
| Yellow Onions 🧅 | 1 whole | Medium-sized, freshly grated |
| All-Purpose Flour 🌾 | ½ cup | For binding mixture |
| Large Eggs 🥚 | 2 whole | Room temperature preferred |
| Salt 🧂 | 1 ½ tsp | Kosher or sea salt |
| Ground Black Pepper 🌶️ | ½ tsp | Freshly ground preferred |
| Vegetable Oil 🫒 | 3 cups | For frying, peanut oil works too |
| Sour Cream 🥛 | ½ cup | For serving, full-fat preferred |
| Applesauce 🍎 | ½ cup | Unsweetened, for serving |
| Fresh Parsley 🌿 | ¼ cup | Chopped, for garnish |
The potatoes are the star—Russet is ideal for its starch content, but Yukon Golds work too. Grab a box of organic potatoes if you can—they grate smoother. I always buy a 3-pound bag from Trader Joe's or the local market. The onions? Sweet yellow caramelizes best, but red onions add a nice bite. Use a box grater (the kind with the big holes) and don't skip peeling the potatoes—those skins make latkes gummy. (And yes, I still grate them by hand. The food processor just doesn't give that same texture.)
No sour cream for serving? Greek yogurt works great—just make sure it's full-fat for that creamy texture. Short on applesauce? Sweetened condensed milk thinned with water is a sneaky substitute. The parsley is optional, but I always add it—fresh from the garden if I can get it, dried if not. Want extra crispiness? Add 1/4 cup cornstarch to the potato mix. The oil matters too—peanut oil has a higher smoke point than vegetable, but either works. If you're frying, keep the oil at 350°F—hotter and they'll burn before cooking through.
Latkes reheat best in a 250°F oven for 10 minutes—crispy again in no time. Store leftovers in the fridge for 3 days (covered, not stacked) or freeze for 3 months. I always make extra—they're even better the next day once the flavors meld. For freezing, lay them flat on a tray first so they don't stick together. Trust me, this is a game-changer for batch cooking.
Why You'll Love This Recipe
- Crispy in Minutes: That first golden sizzle? It happens fast—no waiting for dough to rise or sauces to simmer. Grate those Russets and onions, toss with egg and flour, and you’re flipping perfect latkes before your coffee’s even cold.
- Golden Crunch Magic: Between us, the secret’s in the starch. Russets hold their shape while the edges get that addictive crunch, but the inside stays pillowy—like a hug from Grandma. (Yes, even on a Tuesday night.)
- Leftovers That Work: Fry up a big batch on Sunday, and you’ve got breakfast, lunch, or a snack covered. Reheat in a skillet or oven, and they’re just as good the second time—no sad, soggy leftovers here.
- Budget Breakfast Win: Four ingredients, zero fancy labels. Potatoes and onions stretch further than you’d think, and the flour and egg just tie it all together. My go-to when I’m pinching pennies but still want something that feels like a treat.
Step-by-step instructions for Grandma's potato latkes
Here's how to make latkes that are golden, crispy, and packed with that comforting onion flavor.
Grate the Potatoes and Onions
Peel the 3 lb russet potatoes and grate them using a box grater or food processor fitted with a shredding disk. I like to use the fine side for extra crispiness—this creates smaller pieces that crisp up beautifully. As you grate, place the potatoes in a clean kitchen towel and squeeze out as much moisture as possible. This step is crucial because excess moisture prevents the latkes from browning properly.
Next, grate the 1 whole yellow onion using the same fine side. Combine the grated potatoes and onions in a large mixing bowl. Sprinkle with the 1.5 tsp salt and 0.5 tsp ground black pepper, then mix gently with your hands. You'll notice the mixture starts to release more liquid—this is normal. Let it sit for 10 minutes while you prepare the next step. This resting time helps the flavors meld together and makes the latkes even crispier.
Prepare the Batter
In a separate bowl, whisk together the 2 whole large eggs until they're completely combined. Add the 0.5 cup all-purpose flour and mix until just incorporated. The batter should be smooth but still slightly thick—you don't want it too runny, or the latkes will be soggy. Here's the thing: don't overmix. Just combine until there are no more flour streaks, and the batter looks uniform.
Now, add the potato-onion mixture to the egg-flour batter. Stir gently but thoroughly to coat all the grated vegetables evenly. The batter should hold together when pressed between your fingers, but it doesn't need to be perfectly smooth. If the mixture feels too wet, add a little more of the 0.5 cup all-purpose flour, 1 tablespoon at a time, until it reaches the right consistency. This ensures your latkes will hold their shape while frying.
Heat the Oil and Fry the Latkes
Pour the 3 cups vegetable oil into a deep, heavy-bottomed skillet or Dutch oven. Heat the oil over medium heat until it reaches 350°F on a deep-fry thermometer. If you don't have a thermometer, test the oil by dropping a small piece of potato mixture into it—it should sizzle and float to the surface immediately. This is the perfect temperature for crispy latkes.
Using a tablespoon or ice cream scoop, portion out the batter into the hot oil, spacing them about 1 inch apart. You'll need to work in batches to avoid overcrowding the pan. Fry for 3-4 minutes per side, until the latkes are golden brown and crispy. Here's where the magic happens: the edges should be deep golden, almost mahogany in color, and they should release easily from the oil when you try to flip them with tongs. If they brown too quickly, reduce the heat slightly to prevent burning.
Drain and Serve Warm
Transfer the fried latkes to a paper towel-lined plate or wire rack to drain excess oil. Keep them warm in a 200°F oven while you fry the remaining batches. The key to serving them at their best is to keep them crispy—don't let them sit in oil or they'll turn greasy. Once all the latkes are cooked, transfer them to a serving platter.
Serve the latkes immediately with the 0.5 cup sour cream and 0.5 cup unsweetened applesauce on the side. Garnish with the 0.25 cup chopped fresh parsley for a pop of color and freshness. These latkes are all about that comforting, crispy texture with a perfect balance of potato and onion flavors. Enjoy them while they're hot, with a side of crisp apple slices or a dollop of sour cream for dipping.
Pro Tips For Making Grandma'S Potato Latkes
- GRATE THEM COLD: Russet potatoes release more starch when cold, which means your latkes will hold together better and crisp up properly. I used to grate them right after peeling, but now I let the peeled potatoes sit in cold water for 10 minutes first—it makes all the difference when frying.
- SALT THE ONIONS: Yellow onions taste bland if you skip this. Toss the grated onion with salt and let it sit for 5 minutes before mixing with the potatoes—it softens them slightly and pulls out extra moisture. (Yes, even if you’re impatient like me.)
- DON’T OVERMIX THE BATTER: The moment you combine grated potatoes, egg, and flour, stop stirring. A few lumps are fine—overworking the batter makes latkes dense instead of light and crispy. I learned this the hard way after making a batch that tasted like potato pancake glue.
- USE A THIN LAYER OF OIL: Pour just enough oil to coat the pan—about 2 tablespoons—and spread it thinly with a paper towel. Too much oil makes latkes greasy, and too little causes uneven cooking. (Your future self will thank you for not deep-frying them.)
Essential equipment for grandma's potato latkes
Grate Like a Pro
You absolutely need a box grater with fine holes—I swear by the OXO Good Grips model because it’s sturdy and makes quick work of potatoes. The key is to peel the potatoes first (never grate skins!) and work in batches to avoid soggy piles.
For onions, I use the same grater but switch to the medium side for slightly larger pieces that caramelize beautifully. Pro tip: Squeeze out moisture with a clean kitchen towel after grating—this is non-negotiable for crispy latkes. 🥔
Frying Essentials
Invest in a deep, heavy-bottomed skillet or Dutch oven—I recommend All-Clad for its even heat distribution. A deep-fry thermometer is your best friend to maintain 350°F oil temperature—fluctuations cause greasy or burnt latkes.
If you don’t have one, use the potato test: drop a small piece in—if it sizzles and floats, you’re golden. For oil, peanut oil has a higher smoke point than vegetable oil, but both work. Never reuse oil for multiple batches—fresh oil ensures crispiness. 🫒
Batter Mixing Tools
A wooden spoon or rubber spatula works best for mixing the batter—metal can overwork the eggs. I keep a medium-sized mixing bowl (like the Pyrex 2-quart) handy for combining ingredients. For portioning, an ice cream scoop (like Lily’s brand) is perfect—it gives you evenly sized latkes every time.
If you’re making a big batch, consider a second bowl to keep the potato mixture chilled while you fry. 🥄
Draining and Serving
You’ll need paper towels (the thick, absorbent kind) and a wire rack to drain excess oil—this keeps latkes crispy. For serving, I use a large platter (like Corelle) and keep a small bowl of flour nearby to dust any sticky spots.
A tongs set (like OXO Good Grips) makes flipping latkes effortless. Don’t forget a small bowl for sour cream and another for applesauce—presentation matters! 🍽️
Optional Upgrades
For extra crispiness, add 1/4 cup cornstarch to the potato mix. A silicone spatula helps scrape every last bit of batter from the bowl. If you’re feeling fancy, a mandoline (like Benriner) speeds up grating, but hand-grating gives the best texture.
For leftovers, airtight containers (like Rubbermaid) keep them fresh for days. 💫
Nutrition facts
Frequently asked questions
Why do your latkes need to rest before frying? The 10-minute rest
lets the potato mixture release excess moisture and develop flavor. This creates a better bond between ingredients, ensuring crispy edges and fluffy centers. Skipping this step often leads to greasy or soggy latkes.Can I use sweet potatoes instead of russets?
Yes, but expect a different texture and flavor. Sweet potatoes add natural sweetness and a deeper color, but they're denser and may require 1-2 extra minutes per side. For classic latkes, russets or Yukon Golds work best.
What's the secret to keeping latkes crispy after frying?
Transfer them immediately to a wire rack (not paper towels) to drain oil. Keep them warm in a 200°F oven while frying batches. Reheat in the oven for 5-10 minutes to restore crispiness. Never stack them—they'll turn soggy.
How do I fix latkes that turn out greasy?
Greasy latkes usually mean the oil was too cool or overcrowded. Next time, maintain 350°F oil and fry in small batches. For a quick fix, sprinkle with 1 tsp cornstarch and reheat in a dry skillet for 1 minute per side.
Are latkes traditionally served at any specific meal?
Latkes originated as a Jewish Hanukkah dish, symbolizing oil miracles. Today, they're enjoyed year-round—perfect for breakfast, brunch, or holiday meals. They pair beautifully with smoked fish or as a side for roasted meats.