Breakfast & Brunch
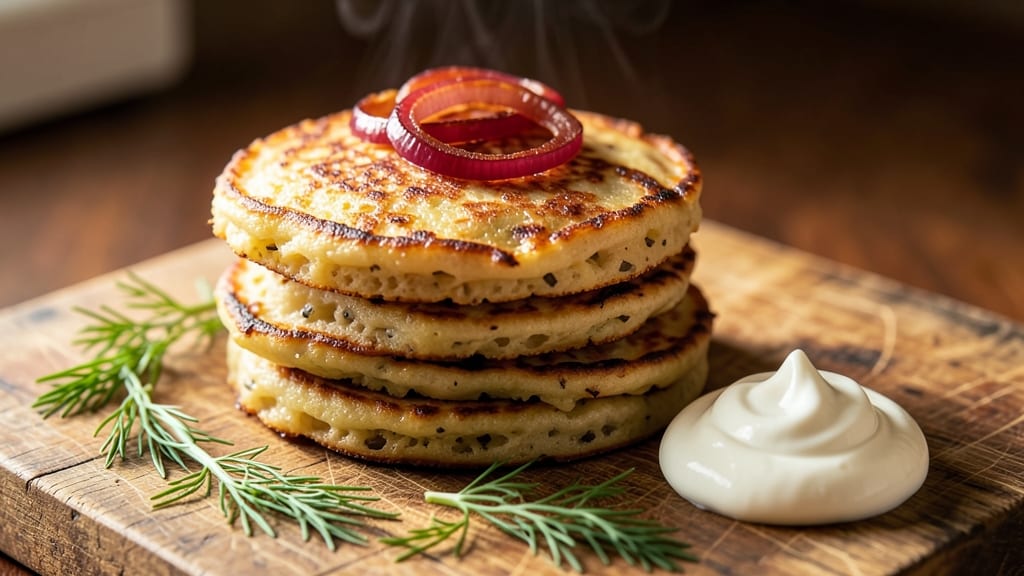
Grandma's potato pancakes bring the comforting aroma of crispy, golden edges and fluffy centers straight to your kitchen—just like the ones I grew up with. These traditional latkes are more than a Hanukkah staple; they're a nostalgic hug in every bite, with vinegar-kissed crunch that makes them impossible to resist.
The secret lies in properly grating the potatoes and maintaining the perfect oil temperature, techniques passed down through generations.
What makes these potato pancakes special is their perfect balance of crispy exterior and tender interior, achieved through a simple yet precise method. You'll need just a few pantry staples—potatoes, eggs, flour, and onions—to create a dish that feels both hearty and light.
The vinegar in the batter adds a subtle tang that enhances the crispiness, while the onions bring sweetness to every bite.
By the time you flip the pancakes, you'll have golden-brown latkes with edges that shatter at the slightest touch and centers that stay delightfully soft. Serve them with a dollop of sour cream, a sprinkle of fresh herbs, or a side of applesauce for the full experience.
These are the kind of pancakes that disappear faster than you can say "more please."
Perfect for breakfast, brunch, or even a festive side dish, these latkes are versatile enough to fit any meal. Once you try them, you'll understand why they've been a family favorite for generations. Let's get cooking!
Ingredients for grandma's potato pancake
Just five core ingredients transform into golden latkes with crispy edges and fluffy centers—no fancy tools needed.
| Ingredient | Amount | Notes |
|---|---|---|
| Russet Potatoes 🥔 | 3 lb | Freshly grated, skin on preferred |
| Large Eggs 🥚 | 2 whole | Room temperature for best binding |
| All-Purpose Flour 🌾 | ½ cup | Lightly spooned, not packed |
| Sweet Yellow Onions 🧅 | 1 whole | Finely grated, not chopped |
| White Vinegar 💧 | 1 tbsp | Distilled preferred for tang |
| Salt 🧂 | 1 ½ tsp | Kosher or sea salt |
| Ground Black Pepper 🌶️ | ½ tsp | Freshly cracked for heat |
| Vegetable Oil 🫒 | 2 cups | High smoke point, like canola |
| Sour Cream 🧈 | ½ cup | Full-fat for serving |
| Fresh Parsley 🌿 | ¼ cup | Chopped, for garnish |
| Applesauce 🍎 | ½ cup | Unsweetened, optional |
The potatoes are the star here, so pick firm, starchy russets—they grate smoother than waxy varieties. Organic potatoes from Whole Foods or your local market have fewer blemishes, which means less grit in your batter. Grate them right before cooking (the good stuff, not the pre-shredded kind)—they oxidize fast, turning brown and watery. A box grater with medium holes works best; if you don’t have one, a food processor with the grating blade does the job. Pro tip: Keep a bowl of cold water nearby to rinse the grated potatoes as you go—this washes away excess starch, which makes them crispier. And yes, leave the skin on if you can—it adds texture!
No vinegar? Lemon juice works in a pinch, but it’s tangier. Short on onions? Substitute with shallots or extra parsley for a milder flavor. The sour cream isn’t just for serving—it’s what makes these latkes extra fluffy. Full-fat is non-negotiable here (trust me on the full-fat version). If you’re feeling fancy, swap the applesauce for a dollop of crème fraîche—it adds a luxurious tang. And if you’re making a big batch, double the oil and keep it warm in a deep skillet or Dutch oven. The secret to perfect latkes? Don’t overcrowd the pan—they need room to crisp, not steam.
These taste even better the next day, so make a double batch and freeze extras. Wrap them in parchment paper, then foil, and they’ll keep for up to 3 months. To reheat, pop them in a 350°F oven for 10-12 minutes until crispy again. Store the batter in the fridge for up to 24 hours—just give it a stir before frying. And if you’re serving a crowd, set out small bowls of sour cream, chopped parsley, and applesauce so everyone can customize their latkes. That’s the real magic of Grandma’s recipe—it’s not just food, it’s a ritual.
Why You'll Love This Recipe
- Crispy Without Fuss: The secret’s in the vinegar—just a splash while grating those Russets keeps them from browning too fast. No fancy techniques, just shred, squeeze, and fry until golden. That’s the magic.
- Onion Love: Here’s what sold me—caramelizing those sweet yellow onions in the pan before adding the batter. They turn into this sweet, jammy base that makes every bite feel like a hug. No one skips the onions.
- Weeknight Hero: Double the batch and freeze half. Thaw in the oven later for dinner or pack them for lunch—still crispy, still delicious. My go-to when I’m too tired to plan but need something solid.
- Pantry Staple Power: Russets, eggs, flour—ingredients you already own. No specialty trips, no wasted money. Plus, leftovers reheat like they’re fresh, so you’re not stuck eating sad pancakes tomorrow. Budget-friendly and foolproof.
Step-by-step instructions for Grandma's potato pancake recipe
Here's how to make these legendary potato pancakes with crispy edges and tender centers—just like Grandma used to make.
Grate the Potatoes and Onions
Start by peeling the 3 lb russet potatoes and grating them using the large holes of a box grater. I like to work in batches—grate half the potatoes, then squeeze out as much moisture as possible using clean kitchen towels or a potato ricer. This step is crucial because excess moisture makes the pancakes soggy. Place the grated potatoes in a large bowl.
Next, peel and grate the 1 whole sweet yellow onion using the same grater. Add it to the potatoes and mix well. The onions add sweetness that balances the tangy vinegar later. Don't skip this step—it's what gives these pancakes that authentic flavor. If you're using the optional 0.5 cup applesauce, fold it into the potato mixture now. It adds moisture without making the pancakes greasy.
Mix the Batter
In a separate bowl, whisk together the 2 whole large eggs, 0.5 cup all-purpose flour, 1.5 tsp salt, and 0.5 tsp ground black pepper. I use a fork for this—just enough to combine everything without overmixing. Add the potato-onion mixture to the egg mixture and stir gently until just combined. You want to keep the batter as dry as possible, so don't overwork it.
Now, stir in the 1 tbsp white vinegar. This might seem odd, but it's what creates that signature tang and helps with browning. The batter should look like wet sand—if it's too sticky, add a little more flour, but don't go overboard. Let the batter rest for 10 minutes while you heat your oil. This resting time helps the flour absorb any remaining moisture, which makes for crispier pancakes.
Heat the Oil
Pour the 2 cups vegetable oil into a deep skillet or Dutch oven and heat it over medium heat until it reaches 350°F. Use a thermometer to check—this is the perfect temperature for golden, crispy pancakes. If you don't have a thermometer, test the oil by dropping a small piece of batter in. It should sizzle and float to the surface within 10 seconds.
Here's the thing—don't rush this step. The oil needs to be hot enough to create that beautiful golden crust on the outside while keeping the inside tender. If the oil isn't hot enough, your pancakes will absorb oil and turn greasy. Keep the heat steady at 350°F throughout the cooking process.
Fry the Pancakes
Using a large spoon or ice cream scoop, carefully drop generous portions of batter into the hot oil. I like to make them about 1 inch thick—don't flatten them with the spoon. Fry in batches, leaving space between pancakes so they have room to crisp. Cook for 4-5 minutes per side, until golden brown and crispy. You'll know they're ready when the edges are deep golden and the pancakes release easily from the oil.
As you fry, place the cooked pancakes on a paper towel-lined plate to drain excess oil. Keep the oil at 350°F between batches—don't let it cool down. If it gets too cool, your later pancakes will turn greasy. Work in batches, but don't overcrowd the pan. You should have enough oil to fry 4-5 pancakes at a time without them sticking together.
Serve Warm
Transfer the crispy pancakes to a serving platter and drizzle with the 0.5 cup sour cream. Sprinkle with the 0.25 cup chopped fresh parsley for a pop of color and freshness. Serve immediately while they're still hot and crispy—these pancakes don't wait! The sour cream adds a creamy contrast to the crispy texture, and the parsley gives a bright finish.
For extra flavor, you can serve these with applesauce on the side or even a dollop of sour cream on top of each pancake. The combination of crispy outside, fluffy inside, and that tangy vinegar kick makes these pancakes irresistible. Enjoy them with a side of crisp apple slices or a simple green salad for a complete meal.
Pro Tips For Making Grandma'S Potato Pancake
- GRATE POTATOES FINE: I learned this the hard way—lumpy shreds mean uneven cooking and a mushy center. Use the large holes of a box grater, then press the potatoes through a clean kitchen towel to squeeze out excess moisture. This isn’t the prettiest method, but it’s the tastiest.
- SOAK ONIONS IN VINEGAR: Sweet yellow onions add flavor, but they can make pancakes gummy if not handled right. Thinly slice them and soak in cold water with a splash of white vinegar for 10 minutes before draining. The acid mellows their sharpness and pulls out some natural sugars—trust me, it makes a real difference.
- DON’T OVERMIX THE BATTER: After burning three batches, I finally figured out that overworking the potato-egg-flour mix makes them dense and heavy. Stir just until combined—lumps are fine, even encouraged. The texture should hold together when pressed, but not be gluey.
- USE COLD PAN, LOW HEAT: High heat = burnt crust, raw inside. Start the pan on medium-low and let it heat gradually. Add about 2 tablespoons of oil—enough to coat the bottom—and wait until it’s shimmering before adding the pancakes. (Yes, even if you’re impatient like me.)
Common mistakes when making great grandma's potato pancake
Over-Grating Mistake
Using a fine grater instead of a medium or box grater creates too much surface area, releasing excess moisture that makes pancakes soggy. I’ve learned the hard way—stick to a medium-hole box grater or the grating blade on a food processor.
If you’re short on time, a mandoline with a grating attachment works too, but don’t press too hard. 🥔
Skipping the Rest
Rushing the 10-minute batter rest is a common trap. This step lets the flour absorb moisture, preventing greasy pancakes. I’ve seen people skip it and end up with dense, oily latkes. Let the batter sit—it’s worth the wait! The texture transforms from sticky to perfect.
Cold Oil Frying
Frying in oil below 350°F leads to greasy, undercooked pancakes. Test the oil by dropping in a small batter piece—it should sizzle and float immediately. If it sinks or bubbles slowly, your oil isn’t hot enough.
I use a Thermoworks thermometer for precision, but even without one, watch for that telltale sizzle. 🌡️
Overcrowding the Pan
Stuffing too many pancakes in the oil lowers its temperature, causing them to steam instead of crisp. The rule is 4-5 pancakes max in a 12-inch skillet with 2 cups of oil. Overcrowding turns crispy edges into soggy bottoms. Work in batches—patience pays off with golden perfection.
Ignoring Vinegar
Omitting the 1 tbsp white vinegar removes that signature tang and crispiness. Vinegar acts as a natural leavening agent, helping the pancakes puff slightly and develop a crispy crust.
Substituting with lemon juice won’t give the same result—stick to vinegar for authenticity. Trust me, it’s non-negotiable for that Grandma-approved crunch. 💧
Flipping Too Soon
Flipping before the pancakes are golden brown (around 4 minutes per side) ruins the texture. The first side needs to develop a deep golden crust before turning.
I use tongs to flip—gentle but firm—to avoid breaking them. If they stick, your oil isn’t hot enough or the batter was too wet. 🔥
Nutrition facts
Frequently asked questions about Grandma's potato pancakes
Can I make these potato pancakes ahead of time?
These pancakes taste even better the next day. Wrap them in parchment paper, then foil, and freeze for up to 3 months. To reheat, bake at 350°F for 10-12 minutes until crispy again. For fridge storage, keep batter for 24 hours or cooked pancakes for 3 days in an airtight container.
What's the best way to store leftover batter?
Store any unused batter in an airtight container in the fridge for up to 24 hours. Before using, give it a good stir—it may thicken slightly from resting. If it looks too dry, add 1 teaspoon of water or milk to loosen it. Never freeze batter as it won't crisp properly when reheated.
Can I use sweet potatoes instead of russets?
Yes, but with adjustments! Sweet potatoes are moister and denser, so you'll need to squeeze out extra moisture after grating. Use 1/2 cup less oil and reduce cooking time to 3-4 minutes per side—they cook faster. For best results, mix sweet potatoes with 1/2 cup grated regular potato to balance texture.
Why are my pancakes greasy instead of crispy?
Greasy pancakes usually mean one of three things: oil wasn't hot enough (350°F is key), batter was too wet, or you overcrowded the pan. Test oil temperature by dropping in a small batter piece—it should sizzle and float immediately. Also, squeeze grated potatoes thoroughly and let batter rest 10 minutes before frying.
What's the best way to serve these pancakes?
Traditional toppings include a dollop of sour cream, chopped fresh parsley, or a side of applesauce. For a hearty meal, serve with crisp bacon or smoked salmon. They're perfect for breakfast, brunch, or even as a side dish during Hanukkah celebrations—just like Grandma used to make!