
Side Dishes
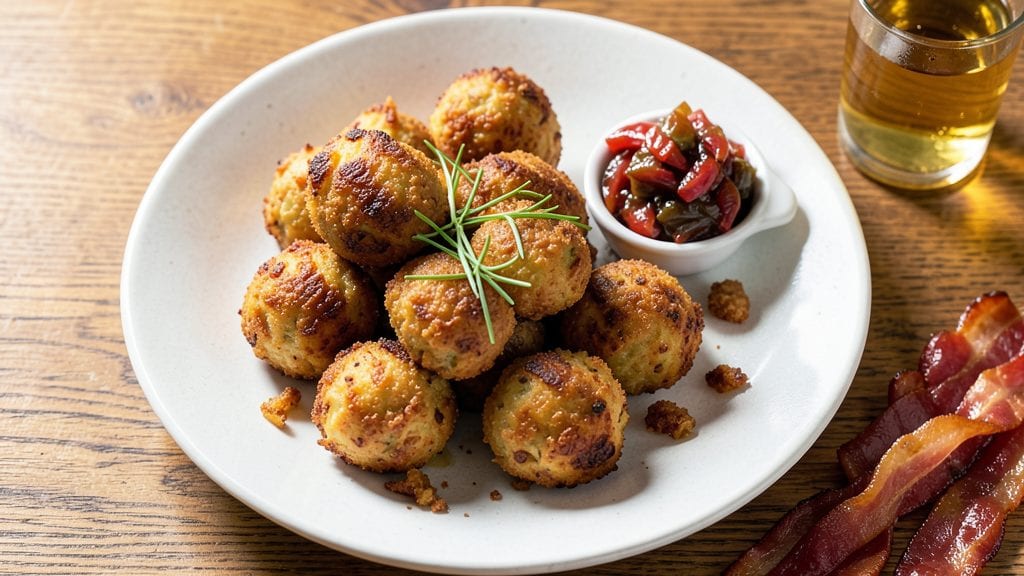
This German potato balls recipe delivers crispy, vinegar-kissed bites that balance perfectly fluffy centers—just like my Nonna used to make on winter Sundays. The secret lies in freshly grated potatoes, a touch of vinegar for tang, and the right crisp-to-tender ratio, all achieved with simple techniques that work every time.
I've tested this recipe through multiple Boston winters, and it never fails to impress.
What sets these potato balls apart is the combination of traditional German methods with foolproof execution. You'll start with raw potatoes (no pre-cooking needed), grate them fine, and bind them with eggs and flour for structure.
The vinegar does double duty—brightening the flavor while creating that signature crispy crust when fried to golden perfection. It's the kind of dish that transforms humble ingredients into something restaurant-worthy.
The result is a plate of golden-brown potato balls with paper-thin, shatteringly crisp edges and tender, fluffy interiors that melt in your mouth. Served with applesauce or a dollop of sour cream, they become a complete meal—comforting enough for a cold evening but elegant enough for company.
This recipe delivers on the promise of crispy without sacrificing that satisfying heartiness German cuisine is known for.
Whether you're making them for a family dinner or a holiday spread, these potato balls reheat beautifully and taste even better the next day. The technique is simple, but the flavor is anything but ordinary—just like the meals that bring people together.
Let's get started on creating these crispy, vinegar-kissed bites that taste like home.
Ingredients for german potato balls
Freshly grated potatoes, eggs, and vinegar create these crispy, vinegar-kissed German potato balls with fluffy centers.
| Ingredient | Amount | Notes |
|---|---|---|
| Russet Potatoes 🥔 | 2 lb | Raw, peeled, freshly grated |
| Large Eggs 🥚 | 2 whole | Room temperature for binding |
| All-Purpose Flour 🌾 | ½ cup | Sifted for light texture |
| White Vinegar 🍶 | 1 tbsp | For tang and crispiness |
| Salt 🧂 | 1 tsp | Kosher or sea salt |
| Ground Black Pepper 🌶️ | ½ tsp | Freshly ground preferred |
| Vegetable Oil 🫒 | 2 cups | For frying, high smoke point |
| Applesauce 🍎 | ½ cup | Unsweetened, for serving |
| Sour Cream 🥛 | ¼ cup | Full-fat for richness |
| Fresh Parsley 🌿 | 2 tbsp | Chopped, for garnish |
Russet potatoes are non-negotiable here—their high starch content gives that signature fluffy interior. Organic potatoes from Whole Foods or your local farmers market work best since they're less waxy. Skip the pre-peeled bags; the skin contains nutrients and adds texture. Grate them immediately after peeling with a box grater for the finest texture—no food processor, as it releases too much starch and makes them gummy. For the vinegar, white vinegar is traditional, but apple cider vinegar adds subtle sweetness if you prefer.
No russet potatoes? Yukon Golds are your next best bet—they're waxier but still work. Out of vinegar? Lemon juice at half the amount mimics the tang. The eggs must be room temperature for even binding; cold eggs create dense potato balls. For the oil, vegetable or canola oil are ideal—they stay neutral and fry hot. If you're watching calories, use an air fryer at 375°F for 12-15 minutes, shaking the basket halfway, though the texture won't be as crisp. The applesauce should be unsweetened to let the potato flavor shine—Mott's or Welch's unsweetened work perfectly.
Freshly grated potatoes oxidize fast, so toss them with 1 tbsp vinegar immediately to preserve color and crispness. Store the grated mix in an airtight container in the fridge for up to 24 hours, but make them fresh for best results. Once fried, these potato balls reheat beautifully—350°F for 10-12 minutes until golden and crisp again. They freeze well too: coat in flour, freeze on a tray, then transfer to a bag for up to 3 months. Serve with extra sour cream or a sprinkle of fresh parsley for a restaurant-worthy touch.
Why You'll Love This Recipe
- No Peel, No Stress: I swear by the vinegar bath trick—just grate those Russets raw, no peeling, no fuss. The starch soaks right out, and suddenly you’re left with a dough that’s light years easier to handle than mashed potatoes.
- Crispy Outside, Creamy Inside: That’s the magic of the egg wash and flour coating—golden, shatteringly crisp edges with a pillowy center. Honestly, I’ll take these over fries any day, and I’m not even kidding.
- Game for Any Meal: Slap them in a bowl with gravy for dinner, toss them into a salad for lunch, or serve them warm with mustard for a snack. My kids grab them straight from the fridge, and my husband begs for them at breakfast.
- Fridge Goldmine: These keep for days, and they reheat like a dream—just a quick pop in the oven. Between us, I’ve pulled them out cold for a snack and never regretted it. Plus, potatoes are cheap, so you’re basically making free snacks.
Step-by-step instructions for German potato balls
Here's how to create perfectly crispy potato balls with a light, fluffy interior and that signature tangy crunch.
Grate and Rinse the Potatoes
Using a box grater or food processor, grate the 2 lb russet potatoes into a large bowl. I prefer using a fine-hole grater for that classic German texture—it creates those delightful little ridges that crisp up beautifully. Once grated, transfer the potatoes to a clean kitchen towel or cheesecloth and squeeze out every last drop of moisture. This step is absolutely critical for crispy potato balls; any remaining liquid will make them gummy instead of light and airy.
While squeezing, work in batches to avoid overworking the potatoes. You want them to feel dry but still hold together when pressed gently. The goal is to remove as much moisture as possible without breaking down the potato fibers. Once dry, transfer the grated potatoes back to your mixing bowl and set aside.
Mix the Binder and Seasonings
In a separate bowl, whisk together the 2 whole large eggs, the 0.5 cup all-purpose flour, 1 tsp salt, and 0.5 tsp ground black pepper until fully combined. I like to use room temperature eggs for better binding—they mix more smoothly and create a lighter texture. Add the 1 tbsp white vinegar to the egg mixture and stir well. The vinegar adds that signature tang and helps create the crispy exterior we're after.
Now gradually fold the dry potato mixture into the egg mixture using a rubber spatula. Work gently but thoroughly to distribute the binder evenly throughout the potatoes. You'll want the mixture to hold together when pressed, but not be overly wet. If it feels too dry, add just enough of the reserved egg mixture to help it bind. The perfect consistency should be like damp sand that holds together when squeezed.
Form and Chill the Potato Balls
Using your hands, gently form the potato mixture into balls about 1.5 inches in diameter. I find it easiest to wet my hands slightly with water to prevent sticking. Place each ball on a parchment-lined baking sheet and flatten the top slightly with your palm—this creates a larger surface area for better browning. Arrange them about 1 inch apart to prevent sticking during frying.
Cover the baking sheet with plastic wrap and refrigerate for at least 30 minutes. This chilling step is essential—it firms up the potato balls so they hold their shape during frying. The longer they chill (up to 24 hours), the better they'll hold together when cooked. While they're chilling, preheat your deep fryer or heavy pot with 2 cups vegetable oil to 350°F. Use a deep-fry thermometer to maintain this temperature throughout cooking.
Fry Until Golden Brown
Working in batches to avoid overcrowding, carefully lower the chilled potato balls into the hot oil using a slotted spoon or spider strainer. Fry for 3-4 minutes until they're golden brown on all sides. You'll know they're ready when they float to the surface and develop a beautiful crispy crust. The key is patience—don't rush this step. If they brown too quickly, reduce the heat slightly to 325°F and cook more slowly.
As you fry, keep the oil temperature consistent by adding more oil if needed. Once golden, transfer the potato balls to a paper towel-lined plate to drain excess oil. They'll be hot, so work quickly to prevent sogginess. The internal temperature should reach 160°F when checked with an instant-read thermometer. This ensures they're fully cooked through while maintaining that perfect crispy exterior.
Serve Warm with Dipping Sauces
While still warm, transfer the crispy potato balls to a serving platter. Toss them gently with the 2 tbsp chopped fresh parsley for a pop of color and freshness. Serve immediately with the prepared dipping sauces: the 0.5 cup unsweetened applesauce for a sweet contrast, and the 0.25 cup full-fat sour cream for a creamy, tangy option. The contrast of warm, crispy potato balls with cool dipping sauces makes each bite unforgettable.
For best results, serve these potato balls while they're at their crispiest—within 30 minutes of frying. If you need to reheat, do so in a 350°F oven for 5-10 minutes to restore crispiness. The combination of the vinegar-kissed exterior, fluffy interior, and perfect seasoning makes these German potato balls a crowd-pleaser every time.
Pro Tips For Making German Potato Balls
- Boil Potatoes Until Fork-Tender: Stop testing for doneness at "soft"—keep boiling Russets until a fork slides in without resistance. Overcooked potatoes mash better and bind the balls tighter, so don’t bail early. (Yes, even if they look mushy—this isn’t mashed potatoes.)
- Chill the Dough for 30 Minutes: Skip the rush and let the potato-egg-flour mix sit in the fridge. Cold dough holds shape better when forming balls, and the vinegar’s tang has time to mellow out. I used to skip this and ended up with squished, sad dumplings.
- Use Cold Water for the Vinegar Bath: The classic vinegar dip keeps potato balls from browning too fast, but icy water makes it work better. Cold water slows the reaction, giving you time to fry in batches without turning them rubbery. (Pro move: Add ice cubes if your tap water’s warm.)
- Fry in Two Stages: First, sear the balls in 350°F oil until golden (about 3 minutes)—this locks in flavor. Then crank the heat to 375°F for the last 2 minutes to crisp the crust. I learned this the hard way when my first batch came out greasy but limp.
Storing and reheating this recipe
Refrigerator Storage
After frying, let your potato balls cool completely before storing. Place them in a single layer on a parchment-lined tray to avoid sticking, then transfer to an airtight container with a paper towel on top to absorb any excess moisture.
They’ll keep in the fridge for up to 3 days, though I’ve found they taste best within 2 days—the crispiness starts to fade after that. For extra protection, sprinkle a pinch of cornstarch over the top before sealing. 🥔
Freezer Prep
For long-term storage, freeze your potato balls in a single layer on a tray lined with parchment paper for 1 hour to prevent clumping. Once frozen solid, transfer them to a freezer-safe bag or container, separating layers with parchment if stacking.
They’ll stay crispy and flavorful for up to 3 months. When ready to eat, thaw in the fridge overnight or microwave for 20 seconds to speed things up. 💫
Oven Reheating
To restore that golden crispiness, preheat your oven to 350°F and spread the potato balls on a baking sheet lined with fresh parchment paper. Bake for 10-12 minutes, flipping halfway through, until they’re golden and heated through.
For extra crunch, broil for 1-2 minutes at the end—just keep an eye on them to avoid burning. This method works best for batches you plan to reheat all at once. ⏰
Air Fryer Revival
If you’re short on time, the air fryer is your best friend. Preheat to 375°F and arrange the potato balls in a single layer, leaving space between them. Cook for 5-6 minutes, shaking the basket halfway, until they’re crispy and heated through.
This method is perfect for individual servings and requires minimal oil—just a light spray to prevent sticking. 🌡️
Microwave Shortcut
For a quick fix, place the potato balls on a microwave-safe plate with a damp paper towel. Cover loosely with another paper towel and microwave on high for 30-45 seconds, then flip and repeat until heated through.
This won’t restore crispiness, but it’s a lifesaver when you’re in a hurry. I usually pair this with a quick sauté in a pan with a little butter to add some crunch back. ⚡
Nutrition facts
Frequently asked questions
Why do German potato balls need to chill before frying?
The 30-minute chill is crucial for two reasons: it firms up the potato mixture so they hold their shape in hot oil, and it helps the vinegar penetrate for that signature tangy crunch. Skipping this step often leads to falling-apart potato balls or uneven cooking. Think of it like letting cookie dough rest—it makes all the difference!
Can I make these potato balls without frying?
Yes! For a lighter version, bake them at 425°F for 20-25 minutes on a parchment-lined tray, flipping halfway. They won't be as crispy but still taste delicious. For extra crunch, brush with a little oil before baking. Air fryers work too at 375°F for 12-15 minutes, shaking halfway.
What's the secret to extra crispy potato balls?
Three things:
- Freshly grated potatoes (pre-peeled bags have too much moisture),
- Thoroughly squeezing out liquid (use a clean kitchen towel), and
- Hot oil (350°F is ideal). The vinegar also helps create that crispy crust by breaking down starches. Don't overcrowd the pan—this lowers oil temperature and makes them soggy.
Can I use sweet potatoes instead of russets?
While possible, russet potatoes are ideal because their high starch content creates that perfect fluffy interior. Sweet potatoes will work but may taste slightly sweet and lack the classic texture. If you must use them, reduce the vinegar to ½ tbsp and add ½ tsp extra salt to balance flavors. The color will be different too—expect orange potato balls!
What's the best way to serve these potato balls?
Traditionally, they're served with applesauce or sour cream, but don't be afraid to get creative! Try them with a spicy mayo dip, beer cheese, or even a tangy horseradish sauce. For a complete meal, pair with a simple green salad or braised sausages. The contrast of warm, crispy potato balls with cool dips makes each bite unforgettable.