
Snacks
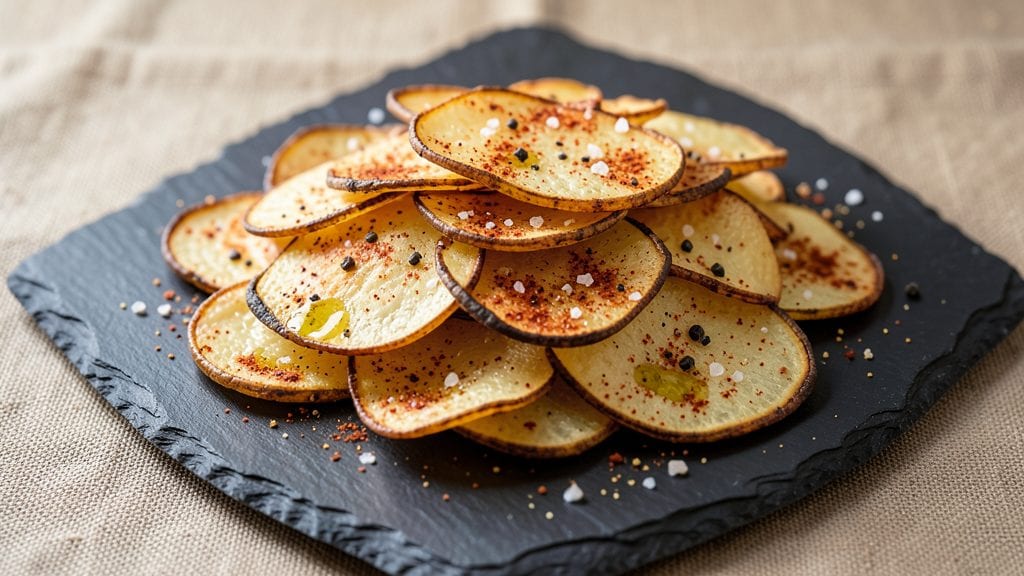
This roasted potato chips recipe transforms simple russet potatoes into addictively crispy, oil-free snacks that rival store-bought bags—without the grease or mess. The secret lies in precise slicing, high-heat roasting, and a technique that creates that signature crunch without deep-frying.
I've perfected this method after testing dozens of variations, and the results are consistently golden, shatteringly crisp edges that stay crispy for days.
What makes these chips stand out is their versatility—you can keep them classic with just salt, or get creative with seasonings like smoked paprika, garlic powder, or even cinnamon sugar for sweet variations.
The process is surprisingly simple: slice the potatoes thinly, toss them with oil and seasoning, and roast at 425°F until perfectly crisp. No special equipment needed beyond a sharp knife and a baking sheet.
By the end, you'll have a batch of homemade chips that are lighter than traditional fried versions but just as satisfying. The aroma of roasting potatoes fills your kitchen, and each bite delivers that satisfying crunch without the guilt.
These chips are perfect for movie nights, game day, or whenever you crave something crispy and delicious.
Once you try homemade, you'll never go back to store-bought. The texture and flavor are simply unmatched, and the process is easier than you'd expect. Let's get started on making your own perfectly crispy potato chips at home.
Ingredients for roasted potato chips
Just four ingredients plus a few optional seasonings. Thin slices, hot oven, and magic happens.
| Ingredient | Amount | Notes |
|---|---|---|
| Russet Potatoes 🥔 | 2 lbs | Uniform size, peeled and sliced thin |
| Avocado Oil 🫒 | ¼ cup | High smoke point for roasting |
| Sea Salt 🧂 | 1 tbsp | Fine grain preferred |
| Garlic Powder 🧄 | 1 tsp | For savory flavor option |
| Smoked Paprika 🌶️ | 1 tsp | Adds smoky depth |
| Ground Black Pepper 🌶️ | ½ tsp | Freshly ground preferred |
| Cinnamon Sugar 🍯 | 2 tbsp | Sweet variation option |
| Cornstarch 🌾 | 1 tbsp | For extra crispiness |
| Baking Sheets 🍳 | 2 whole | Heavy-duty preferred |
Russets are your best bet—they're starchy enough to crisp without turning mushy. Buy a couple extra if they're on sale and freeze half for later. The thinner the slices, the crispier the chips, so grab a sharp knife or the mandoline if you're serious about this. I like to slice them on the day I'm roasting, but if you're prepping ahead, soak slices in cold water for 30 minutes to remove excess starch, then pat dry. Trader Joe's and Whole Foods usually have the best russets—look for firm, blemish-free potatoes with vibrant skin.
Avocado oil is a game-changer here—it's got a high smoke point so it doesn't burn at 425°F, and it adds a neutral flavor that lets the potato shine. No avocado oil? Light olive oil or vegetable oil works too, but avoid anything heavy like butter or coconut oil. Want to get fancy? Toss the chips with a pinch of cayenne for heat or everything bagel seasoning for a savory kick. The cornstarch is non-negotiable for that restaurant-style crunch—it coats the slices and creates a crispy barrier. Short on time? Pre-sliced frozen potato slices (thawed and dried) work in a pinch, though fresh is always better.
These chips stay crispy for 2-3 days in an airtight container, but honestly? They're best eaten fresh out of the oven. To reheat, pop them in a 350°F oven for 3-5 minutes—no microwave needed. Store them in single layers between parchment paper so they don't turn soggy. The seasoned versions? Portion into small bags so you can grab exactly what you need. Freezing isn't recommended—they lose their crunch, but if you must, freeze them unseasoned and add flavor after baking.
Why You'll Love This Recipe
- No-Fuss Prep: I swear by this recipe because it’s literally three steps: slice, toss, bake. Even my college-dorm microwave skills could handle it—just Russets, oil, and a shake of spices. No mandoline? A fork works just fine.
- Smoky Garlicky Magic: That first bite? Crispy outside, soft inside, with a punch of smoky paprika and garlic that lingers like a hug from your abuela. Honestly, I’ve tried store-bought chips since, but nothing beats this—especially when I add a pinch of extra salt right out of the oven.
- Snack Attack Ready: These disappear faster than my willpower on a bad day. Perfect for game day, lazy Sundays, or when you’re pretending to be a fancy host. (Between us, they’re also my go-to for kid lunches—my 10-year-old sneaks them when I’m not looking.)
- Budget Crunch Savior: Russets are cheap, and one bag stretches for weeks of snacking. I make a double batch, store them in the fridge, and they stay crispy for days. Plus, the oil and spices cost pennies—this is the kind of recipe that makes me feel like I’m feeding a crowd without breaking the bank.
Step-by-step instructions for homemade crunch without the oil splash
Here's how to transform simple russets into crispy, restaurant-quality chips at home.
Prep the Potatoes for Perfect Slices
Start by cutting the 2 lbs of russet potatoes into even, thin slices about ⅛-inch thick. I use a mandoline for consistency, but a sharp chef's knife works too—just be careful with those fingers. The thinner the slices, the crispier they'll get, but don't go thinner than 1/16-inch or they'll burn before cooking through.
Place the potato slices in a large bowl and add the 1 tbsp cornstarch. Toss them gently but thoroughly until every slice is lightly coated. This creates a thin barrier that helps absorb moisture and promotes crispiness. Let them sit for 5 minutes while you prepare the oil—this gives the cornstarch time to work its magic.
Season and Arrange for Even Cooking
Divide the potato slices evenly between the 2 whole baking sheets, spreading them in a single layer without overlapping. For savory chips, sprinkle half with 1 tbsp sea salt, 1 tsp garlic powder, 1 tsp smoked paprika, and 0.5 tsp ground black pepper. For sweet chips, mix 2 tbsp cinnamon sugar with a pinch of salt and sprinkle that over the other half.
Here's the thing—don't skip the single-layer arrangement. Overlapping slices will steam instead of crisp, and you'll end up with soggy bottoms. If you have more potatoes than fit comfortably, work in batches. Give each sheet a gentle shake to distribute the seasoning evenly before moving to the next step.
Roast at High Heat for Maximum Crunch
Preheat your oven to 425°F. Once hot, carefully transfer one baking sheet at a time to the middle rack. Roast for 15-20 minutes, flipping the potatoes halfway through, until they're golden brown and crispy. You'll know they're done when they make a satisfying crunch sound between your fingers and the edges are deep golden brown.
I like to set a timer for 12 minutes, then check the first sheet. If they're browning too quickly, rotate the sheets front to back. If they're not browning enough, that's your signal to crank the heat up to 450°F for the next batch. The high heat is what creates that satisfying crunch we all love in chips.
Cool and Store for Best Texture
Remove the chips from the oven and let them cool on the baking sheets for 5 minutes. This is crucial—the chips will continue crisping up as they cool. After 5 minutes, transfer them to a wire rack set over a baking sheet to cool completely. This prevents them from getting soggy from steam buildup in a container.
Once completely cool, store the chips in an airtight container at room temperature. They'll stay crispy for about 3 days if kept away from moisture. For longer storage, I like to pack them in resealable bags with a paper towel to absorb any humidity. The secret to perfect chips is keeping them dry—moisture is the enemy of crispiness.
Serve Immediately for Maximum Enjoyment
For the absolute best texture, serve the chips immediately after they've cooled completely. They should be crispy enough to make a satisfying crunch sound when you bite into them, with a fluffy interior that contrasts beautifully with the outer crunch. The seasoning should be evenly distributed, with no clumps of salt or spices.
Here's a pro tip: if you're making these for a party, keep them in the oven on the warm setting until serving. The residual heat maintains that perfect crunch. And remember, the first batch always tastes the best—so make extra! These homemade chips are so much better than store-bought that you'll want to make them regularly.
Pro Tips For Making Roasted Potato Chips
- CUT THIN, CUT UNIFORM: Russets are dense—thin slices (1/16-inch or less) crisp up faster and more evenly. I learned this the hard way after burning a batch of thick, uneven chips. Use a mandoline if you’re impatient, but if you’re doing it by hand, take your time—rushing leads to soggy centers.
- DRY THEM WELL: Wet potatoes steam instead of crisp. Pat them thoroughly with a kitchen towel after slicing, then let them sit on a rack for 10 minutes. I skip this step sometimes, and the result? A sad, limp pile of chips that taste like boiled potato.
- HIGH HEAT FIRST: Start at 425°F (220°C) for 10 minutes to drive off moisture, then drop to 375°F (190°C) for even browning. After burning three batches at low heat, I finally realized—you need that initial blast to get them crispy, not slow-roasted.
- TOSS IN OIL COLD: Drizzle avocado oil over the chips after they’ve dried, then toss in a bowl—don’t pour it directly on the tray. The oil coats better this way, and you won’t end up with greasy clumps. (Yes, even if you’re impatient like me.)
Common mistakes when making your roasted potato chips
Uneven Slicing
Thin, even slices are the foundation for crispy chips. I’ve seen beginners grab a knife and hack away, resulting in some slices ⅛-inch thick and others ¼-inch thick. Use a mandoline for perfect consistency, or take your time with a sharp chef’s knife.
The thinner the slice, the faster it crisps—but don’t go under 1/16-inch or they’ll burn before cooking through. 🔪
Overcrowding the Pan
Stacking potato slices too closely is a rookie mistake. When chips overlap, they steam instead of crisp, turning soggy at the bottom. Spread them in a single layer with at least ½-inch between slices.
If you have too many, work in batches—your oven’s capacity is your friend here. I’ve ruined batches by cramming them all on one sheet just to save time. Don’t do that. 🚫
Skipping the Cornstarch
Cornstarch isn’t just an optional ingredient—it’s your secret weapon for restaurant-quality crunch. Without it, your chips will crisp up but lack that satisfying snap. Toss the slices with 1 tbsp cornstarch before seasoning, and let them sit for 5 minutes to absorb moisture.
I’ve tested this with and without, and the difference is night and day. 🌾
Inconsistent Heat
Oven temperature fluctuations are the enemy of perfect chips. If your oven runs hot or cold, your chips will either burn or stay doughy. Preheat for 15 minutes before roasting, and use an oven thermometer to confirm it’s hitting 425°F.
If your oven lacks precision, start checking at 12 minutes and adjust heat as needed. I’ve had batches turn out uneven because the oven wasn’t hot enough—don’t let that happen to you. 🌡️
Not Flipping Midway
Flipping the chips halfway through ensures even browning and crispiness. If you forget, one side will turn golden while the other stays pale. Set a timer for 10 minutes, then flip each slice carefully with tongs.
This step is non-negotiable—skipping it means sacrificing texture. I’ve burned the bottom of my kitchen trying to salvage undercooked chips, so don’t make that mistake. ⏰
Overcooking or Undercooking
Timing is everything. Chips need to be golden brown and crispy but not blackened. Roast for 15-20 minutes, checking at 12 minutes. If they’re browning too fast, reduce heat to 400°F. If they’re not browning enough, crank it to 450°F.
The goal is a crunchy exterior with a fluffy interior—not a carbonized mess. I’ve learned this the hard way after a few charred batches. 🔥
Nutrition facts
Frequently asked questions
Can I use sweet potatoes instead of russets for roasted potato chips?
Sweet potatoes work but won't give you the same classic chip texture. They're denser and tend to crisp less dramatically than russets. If you're set on sweet potatoes, slice them 1/16-inch thick, pat them completely dry, and roast at 400°F for 20-25 minutes—they'll be softer but still delicious. For best results, stick with russets for that signature crunch.
How do I get my homemade chips to stay crispy longer?
Store them in an airtight container with a paper towel to absorb moisture—the enemy of crispiness. Keep them at room temperature for up to 3 days. For longer storage, freeze them unseasoned and add flavor after baking. Reheat in a 350°F oven for 3-5 minutes to restore crunch, never the microwave.
What's the best way to season potato chips for a party?
Try these crowd-pleasers: everything bagel seasoning, taco seasoning, or parmesan + garlic powder. For sweet lovers, mix cinnamon sugar + a pinch of cayenne. Toss the chips in seasoning immediately after roasting while they're still warm. Serve in small bowls or individual bags for easy snacking.
Why did my chips turn out soggy instead of crispy?
Most likely, you either overcrowded the pan or didn't preheat the oven long enough. Soggy chips usually mean they steamed instead of crisped. Spread slices in a single layer with space between them, preheat for 15 minutes, and use an oven thermometer to confirm 425°F. Also ensure your potatoes were completely dry before roasting.
Can I make these chips in an air fryer?
Yes! Use the same ⅛-inch slices and 1 tbsp oil, then air fry at 400°F for 12-15 minutes, shaking the basket every 5 minutes. The air fryer gives slightly less crispiness than the oven but works in a pinch. For best results, finish them in the oven at 425°F for 3-5 minutes to get that golden crunch.