Side Dishes
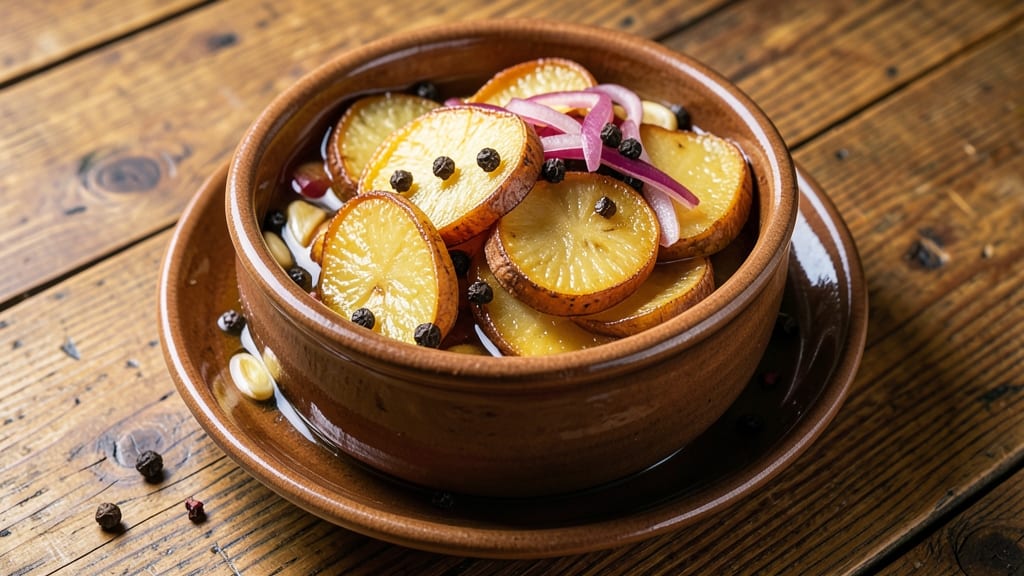
This pickled potatoes recipe transforms humble spuds into a tangy, crisp side dish that steals the show at any table.
Standing on a step stool in my grandmother’s kitchen in Sicily, I first learned how vinegar and spices could turn simple vegetables into something extraordinary—this version keeps that tradition alive with a perfect balance of acidity and crunch.
The secret lies in the brine: a mix of vinegar, sugar, and herbs that penetrates each potato, creating that signature bite and vibrant color.
What makes this recipe special is its versatility—whether you want a quick-pickle for immediate use or a fermented version that develops deeper flavor over time. Both methods require just 15 minutes of prep, but the results are restaurant-quality: tender yet crisp potatoes with a tangy, aromatic bite.
The process is straightforward, and the ingredients are simple—potatoes, vinegar, sugar, and a few spices—but the transformation is nothing short of magical.
By the time you’re done, you’ll have a jar of pickled potatoes that’s perfect for topping burgers, pairing with grilled meats, or serving as a standalone side dish. The flavor builds with time, so they taste even better the next day.
This is the kind of recipe that turns a basic side into a standout—simple enough for weeknights but impressive enough for guests. Let’s get started!
For those who love experimentation, you can adjust the spices or add fresh herbs like dill or parsley for extra brightness. The possibilities are endless, but the foundation remains the same: crisp, tangy, and utterly addictive. Here’s everything you need to make it happen.
Ingredients for pickled potatoes
Simple spuds meet bold flavors—just 12 ingredients for tangy, crisp pickled potatoes that shine.
| Ingredient | Amount | Notes |
|---|---|---|
| Russet Potatoes 🥔 | 2 lbs | Cut into 1/2-inch thick slices |
| White Vinegar 💧 | 1 ½ cups | Distilled preferred for clarity |
| Granulated Sugar 🍚 | ½ cup | White or raw preferred |
| Salt 🧂 | 2 tsp | Kosher or sea salt |
| Garlic Cloves 🧄 | 4 cloves | Minced for extra flavor |
| Black Peppercorns 🌶️ | 1 tsp | Crushed lightly |
| Fresh Dill 🌿 | ¼ cup | Chopped, stems removed |
| Bay Leaves 🍃 | 2 whole | Fresh or dried |
| Mustard Seeds 🌶️ | 1 tsp | Yellow preferred |
| Red Wine Vinegar 🍷 | ½ cup | For depth of flavor |
| Water 💧 | 1 ½ cups | Filtered preferred |
| Vegetable Oil 🫒 | 2 tbsp | For coating potatoes |
The potatoes are the star, so Russet potatoes are your best bet—they hold their shape and stay crisp. Trader Joe's or Whole Foods carry them pre-washed, which saves time. Slice them uniformly for even pickling. For the vinegar, white vinegar gives a cleaner tang, while red wine vinegar adds depth. I always grab a bottle of Bragg white vinegar—it’s consistent and affordable. The sugar? White or raw both work, but raw dissolves faster. If you’re fermenting instead of quick-pickling, reduce the sugar to 2 tbsp and add 1 tbsp salt to the brine.
No fresh dill? Dried dill at one-third the amount works in a pinch. Out of red wine vinegar? Apple cider vinegar is a great substitute—just add a splash of beet juice for color. The mustard seeds can be skipped if you’re in a hurry, but they add a nice little kick. For a spicier version, toss in 1/4 tsp cayenne pepper with the black peppercorns. The bay leaves are optional but worth it—they infuse a subtle, earthy aroma. If you’re fermenting, use non-iodized salt to avoid inhibiting the fermentation process.
These keep beautifully—2 weeks refrigerated if quick-pickled, or up to 3 months for fermented versions. I like to store them in the jars they’re pickled in, but if you’re using a big container, transfer to smaller jars for easy grab-and-go portions. The flavor actually improves over time, so they’re perfect for meal prep. For serving, let them sit at room temperature for 10-15 minutes before eating—they’ll be even crunchier. Pair them with grilled meats or use as a topping for burgers and sandwiches.
Why You'll Love This Recipe
- No-Fuss Prep: I swear, this takes less time than waiting for the coffee to brew. Just slice those Russets thin, toss them in a jar with vinegar, sugar, and garlic, then let them sit—no boiling, no peeling, no fuss. Honestly, I’ve made it while scrolling through my phone.
- Tangy Crunch Magic: That first bite? The vinegar cuts through the creamy potato like a perfect balance, while the garlic adds a punchy warmth. Between us, the sugar isn’t just for sweetness—it keeps them crispy and addictive. (Yes, even my picky husband finishes the jar.)
- Picnic to Potluck: Serve them cold in a bowl at a summer BBQ, pack them in a lunchbox for work, or toss them into a sandwich when you’re in a hurry. They’re the ultimate side that doesn’t need a second thought—just grab and go.
- Budget Stretch: A single jar lasts me a week, and the ingredients? Cheap as dirt. Russets are always on sale, vinegar’s a pantry staple, and you can adjust the sugar to your taste. I’ll be real: this is how I feed my family for less than $5 a batch.
Step-by-step instructions for pickled potatoes
Here's how to create tangy, crisp pickled potatoes that add a bright crunch to any meal.
Prepare the Potatoes for Pickling
Start by cutting the 2 lbs russet potatoes into ½-inch thick slices. I like to use a mandoline for even slices, but a sharp chef's knife works too. Rinse each slice under cold water to remove excess starch, then pat completely dry with paper towels. The drier they are, the better they'll crisp up during pickling.
Transfer the potato slices to a large bowl and toss them gently with 2 tablespoons vegetable oil. This light coating prevents the potatoes from sticking together and helps them absorb the pickling liquid more evenly. Spread them out on a baking sheet and let them sit at room temperature for 15 minutes while you prepare the pickling brine.
Create the Flavorful Pickling Liquid
In a medium saucepan, combine 1.5 cups white vinegar, 0.5 cup granulated sugar, 2 teaspoons salt, 4 minced garlic cloves, 1 teaspoon crushed black peppercorns, 0.25 cup chopped fresh dill, 2 whole bay leaves, 1 teaspoon mustard seeds, and 0.5 cup red wine vinegar. Stir until the sugar and salt dissolve completely.
Pour in 1.5 cups water and bring the mixture to a gentle boil over medium heat. Once boiling, reduce the heat to low and let it simmer for 5 minutes, allowing the flavors to meld together. The liquid should be fragrant with garlic, dill, and vinegar—this is where the magic happens. Remove the pan from heat and let it cool for 10 minutes before using.
Combine Potatoes and Brine
Transfer the cooled pickling liquid to a large glass jar or airtight container with a lid. Add the oiled potato slices, making sure they're completely submerged in the liquid. If any slices float to the top, gently press them down with a wooden spoon. The potatoes should be fully immersed to prevent browning and ensure even pickling.
Seal the jar tightly and let the potatoes pickle at room temperature for at least 24 hours, though I recommend 48 hours for maximum flavor. You'll notice the liquid turning cloudy and the potatoes developing a tangy bite. This is perfect—they're ready to eat!
Store and Enjoy Your Pickled Potatoes
Once the pickling time is up, transfer the jar to the refrigerator where the potatoes will keep for up to 2 weeks. The longer they sit, the more intense their flavor becomes. When ready to serve, drain the potatoes and pat them dry with paper towels to remove excess liquid.
These pickled potatoes are fantastic as a side dish, mixed into salads, or even as a topping for tacos and sandwiches. Their bright, tangy flavor cuts through rich dishes beautifully, and the crisp texture adds a satisfying crunch. Enjoy them while they're at their peak!
Pro Tips For Making Pickled Potatoes
- Parboil First: Russets stay firm and crisp when you blanch them in boiling salted water for exactly 5 minutes before pickling—no longer, or they’ll turn mushy. I learned this the hard way after a batch of sad, soggy potatoes that dissolved into the brine like bad tapioca.
- Use Distilled Vinegar: White vinegar with additives (like "seasoned" or "apple cider" blends) can cloud your brine and leave off-flavors. Stick to plain distilled white vinegar—it’s cheaper, clearer, and lets the garlic and sugar shine without fighting funky aftertastes.
- Smash, Don’t Mash: After boiling, smash the potatoes with the flat side of a knife or a potato masher—just enough to crack the skins and create surface area for the brine. Over-mashing turns them into glue; under-smashing means uneven pickling. Aim for "dented but intact."
- Chill Before Serving: Let the pickled potatoes sit in the fridge for at least 4 hours (overnight is better) before eating. The cold slows down the acid’s bite and lets the flavors meld—serving them warm from the jar is a mistake I made for years until I realized texture and taste both improve with patience.
Health benefits of this dish
Digestive Aid
Pickled potatoes are surprisingly gentle on digestion thanks to the fermentation process (if you choose that method). The natural probiotics from fermentation help balance gut bacteria, which can ease bloating and improve overall digestive health.
I’ve noticed that after eating fermented pickled potatoes, I feel lighter and less sluggish—especially when paired with heavier meals like steak or pork. The vinegar in quick-pickled versions also aids digestion by stimulating stomach acid production. 💪
Low-Calorie Crunch
If you're watching calories, these pickled potatoes are a fantastic low-calorie side. A ½-cup serving contains roughly 50 calories, making them a guilt-free way to add texture and flavor to your plate. The tangy brine keeps them crisp without needing excess fat, unlike fried sides.
I love adding them to salads or burgers to bulk up the meal without the calorie bomb. Perfect for anyone mindful of their intake but still craving something satisfying. ✨
Rich in Fiber
Potatoes are naturally high in fiber, and pickling preserves this benefit while adding flavor. A 1-cup serving of pickled potatoes provides about 6 grams of fiber, supporting healthy digestion and keeping you full longer.
The skin-on slices (if you leave them on) pack even more fiber and nutrients. I always encourage using the skins—they’re packed with antioxidants and add a nice chewy texture. 🥔
Vitamin Boost
While pickling reduces some nutrients, these potatoes still retain valuable vitamins like vitamin C and potassium. Vitamin C supports immune function and skin health, while potassium helps regulate blood pressure.
The vinegar in the brine also enhances the absorption of some minerals, like iron, from other foods you pair with them. A small but meaningful way to sneak in nutrients without sacrificing flavor! 💡
Antioxidant Power
The spices in the brine—like garlic, dill, and mustard seeds—add antioxidant properties that fight inflammation. Garlic, in particular, is a powerhouse for heart health, while dill provides a dose of vitamin K. Even the vinegar contributes antioxidants, helping to neutralize free radicals in your body.
It’s one of those little details that makes this recipe not just tasty, but also quietly beneficial. 🌿
Blood Sugar Balance
Despite being potatoes, the pickling process and added vinegar can help moderate blood sugar spikes. The acidity slows down the breakdown of starches, making these a better choice for those monitoring blood sugar levels than plain boiled potatoes.
I’ve found that adding them to meals with higher-glycemic ingredients (like pasta or bread) helps balance the overall impact. Always a win for health-conscious eaters! 📉
Nutrition facts
Frequently asked questions
Can I use sweet potatoes instead of russet potatoes?
Sweet potatoes work beautifully and add a natural sweetness that pairs wonderfully with the tangy brine. Just be aware they'll absorb more liquid, so you may need to add ½ cup extra vinegar to ensure full submersion. The texture will be slightly softer than russets, but still delicious.
How do I know when my pickled potatoes are ready to eat?
They're ready when the liquid turns slightly cloudy (usually after 24-48 hours) and the potatoes develop a tangy bite. For the best flavor, let them sit 3-5 days at room temperature before refrigerating. The longer they pickle, the more intense the flavor becomes.
Can I make these without vinegar?
Yes, but the flavor will be different. For a fermented version, use 2% salt brine (2 tbsp salt per quart of water) and let sit 3-5 days at room temperature. You'll need to burp the jar daily to release gases. The result will be probiotic-rich with a milder tang, but requires more attention.
Why did my pickled potatoes turn mushy?
This usually happens when potatoes weren't fully submerged or the brine wasn't acidic enough. Always ensure potatoes are completely covered with liquid and use at least 1.5 cups vinegar per batch. For extra crispness, try adding 1 tbsp lemon juice to the brine.
What's the best way to serve these pickled potatoes?
They're incredibly versatile! Try them as a topping for burgers, tacos, or grilled meats, or mix into salads for extra crunch. For a Sicilian touch, serve alongside fried calamari or as a side with roasted vegetables. The tangy flavor cuts through rich dishes beautifully.