Desserts
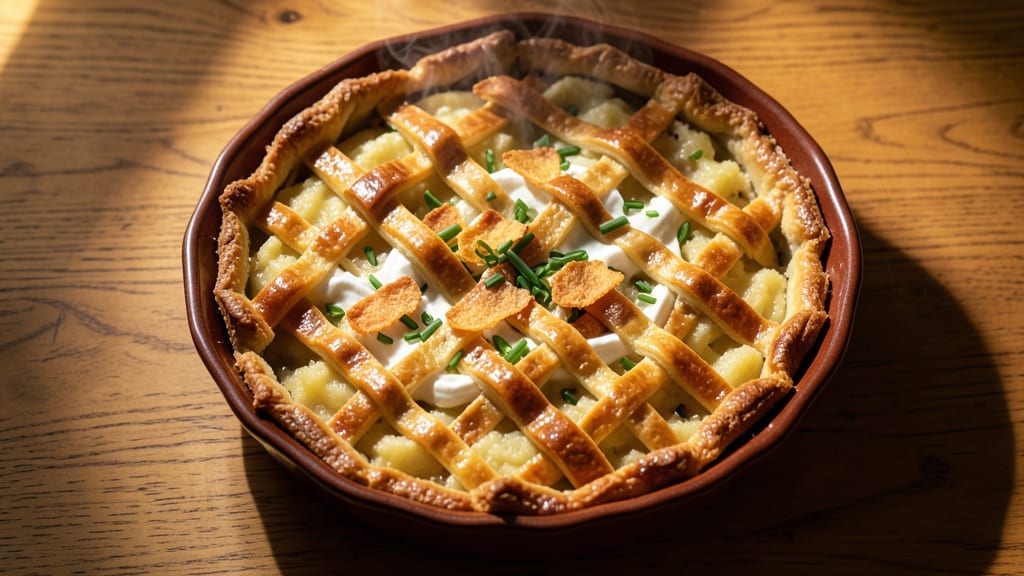
Grandma's old-fashioned potato pie recipe brings back the warmth of family gatherings and the comforting aroma of a homestyle dessert. This classic dessert features a flaky crust and a creamy, spiced filling made with mashed potatoes, butter, and just the right amount of cream and eggs.
The secret lies in the traditional techniques that ensure a perfectly golden, tender pie every time.
What makes this recipe special is its ability to transport you to a simpler time, where meals were made with love and patience. The crust requires a bit of attention—blind-baking it ensures a crispy base that won’t turn soggy under the filling.
Meanwhile, the filling is where the magic happens: rich, velvety, and just sweet enough to satisfy even the pickiest dessert lovers.
The result is a pie that’s as beautiful as it is delicious—a golden crust encasing a smooth, spiced potato filling that’s both comforting and indulgent. It’s the kind of dessert that disappears quickly, leaving only crumbs and happy memories behind.
Perfect for holidays, family dinners, or whenever you crave a taste of home.
Once you try this recipe, you’ll understand why it’s been a staple in kitchens for generations. The combination of a flaky crust and a perfectly spiced filling makes it a dessert worth repeating, again and again.
Ingredients for grandma's old fashioned potato pie
Simple pantry staples transform into Grandma's nostalgic potato pie with just a few key ingredients.
| Ingredient | Amount | Notes |
|---|---|---|
| All-Purpose Flour 🌾 | 2 ½ cups | For flaky crust, sifted preferred |
| Unsalted Butter 🧈 | 1 cup | Cold, cubed for crust |
| Ice Water 💧 | ½ cup | For pie crust |
| Salt 🧂 | ½ tsp | Fine sea salt preferred |
| Russet Potatoes 🥔 | 3 lb | Peeled, boiled, mashed smooth |
| Heavy Whipping Cream 🥛 | 1 cup | Full-fat for richness |
| Large Eggs 🥚 | 2 whole | Room temperature |
| Granulated Sugar 🍚 | ¾ cup | Light brown preferred |
| Ground Cinnamon 🌿 | 1 tbsp | Freshly ground preferred |
| Ground Nutmeg 🌶️ | ½ tsp | Freshly grated nutmeg |
| Vanilla Extract 🍯 | 1 tsp | Pure vanilla preferred |
| Salted Butter 🧈 | ½ cup | Melted for filling |
The crust is all about the butter—cold, cubed butter creates flaky layers that'll make everyone swoon. King Arthur or Gold Medal flour bakes up extra tender, but any all-purpose works. For the potatoes, Russets are non-negotiable—their starchy goodness is what makes this pie creamy. I always buy a few extra pounds at Trader Joe's when they're on sale, since they keep well in the pantry. The secret to perfect mashed potatoes? Don't overwork them—lumpy is better than gluey for this pie.
No heavy cream? Whole milk plus a splash of cream cheese works in a pinch, though it won't be quite as rich. Running short on brown sugar? White sugar plus a pinch of cinnamon gets you close. The nutmeg is where this pie gets its signature warmth—freshly grated nutmeg tastes worlds better than pre-ground, but if you must use pre-ground, double the amount. For the vanilla, imitation won't cut it—this is one time you want the real deal. The salted butter in the filling? Don't skip it—it balances all that sweetness perfectly.
Mashed potatoes keep 3 days in the fridge, but I always make extra and freeze portions. The pie crust dough can be shaped and refrigerated for up to 2 days—just let it sit at room temperature for 30 minutes before rolling. The fully assembled pie? 3 days in the fridge, but it reheats beautifully. I like to make this ahead for Thanksgiving—it tastes even better the next day after all the flavors meld together.
Why You'll Love This Recipe
- No-Fuss Dough: I swear, the crust comes together with just flour, butter, and ice water—no mixer, no fuss. Roll it out while the potatoes boil, and honestly? It’s hard to mess up.
- Creamy Crisp Perfection: That buttery crust meets fluffy, seasoned potato filling—crisp edges, silky center. Russets hold their shape, and the salt in the dough? Chef’s kiss.
- Potluck Star: Bring this to gatherings and watch it disappear. It reheats beautifully, so it’s my go-to for church dinners or holiday leftovers. (Yes, even on a Tuesday night.)
- Budget Buster: Potatoes and butter stretch far, and the dough uses pantry staples. I’ve fed six people for under $10—and still had seconds. Practical? Absolutely. Delicious? Ridiculously so.
Step-by-step instructions for Grandma's old-fashioned potato pie
Here's how to recreate Grandma's legendary potato pie with a tender crust and spiced filling that melts in your mouth.
Make the Flaky Pie Crust
In a large bowl, combine the 2.5 cups all-purpose flour and 0.5 teaspoon salt. Cut in the 1 cup unsalted butter using a pastry cutter or your fingers until the mixture resembles coarse crumbs with pea-sized butter pieces. This ensures a tender, flaky texture rather than a tough crust.
Add the 0.5 cup ice water gradually, mixing just until the dough comes together. Be careful not to overwork it—handle it as little as possible. Once combined, turn the dough onto a lightly floured surface and knead gently 5-6 times until smooth. Divide the dough into two equal balls, flatten into discs, wrap in plastic, and refrigerate for at least 1 hour. Chilling prevents shrinking during baking and makes rolling easier.
Prepare the Spiced Potato Filling
While the dough chills, peel and boil the 3 lb russet potatoes until fork-tender, about 15-20 minutes. Drain well, then mash them until completely smooth—no lumps! Stir in the 1 cup heavy whipping cream, 0.75 cup granulated sugar, 1 tablespoon ground cinnamon, 0.5 teaspoon ground nutmeg, and 1 teaspoon vanilla extract. The filling should be thick but spreadable, like a rich mashed potato.
In a separate bowl, beat the 2 whole large eggs until frothy. Gently fold them into the potato mixture, taking care not to deflate the air incorporated during beating. This step ensures a creamy texture rather than a dense filling. Taste and adjust sweetness if needed—Grandma's version was always perfectly balanced between sweet and spiced.
Assemble the Pie
Preheat your oven to 375°F. Roll out one dough disc on a floured surface to fit a 9-inch pie dish, leaving a 1-inch overhang. Transfer to the dish and trim the edges. Prick the bottom with a fork to prevent bubbling. Pour the melted 0.5 cup salted butter evenly over the crust, then add the potato filling, spreading it smoothly to the edges.
Roll out the second dough disc and cut into strips about ½-inch wide. Weave these strips over the filling in a lattice pattern, leaving the center open for steam to escape. Brush the lattice with a little beaten egg for a golden finish. This classic design keeps the pie tender while creating beautiful crust edges.
Bake to Golden Perfection
Place the pie on a baking sheet (to catch any drips) and bake for 45-50 minutes until the crust is deep golden brown and the filling is set but still slightly jiggly in the center. If the edges brown too quickly, cover them with foil. The pie is done when it pulls away slightly from the pan and the filling reaches 170°F internally.
Let the pie cool completely before slicing—at least 2 hours. This resting period allows the filling to fully set and the flavors to meld. Serve warm or at room temperature with a dollop of whipped cream if desired. The contrast between the flaky crust and velvety filling makes every bite worth the wait.
Pro Tips For Making Grandma'S Old Fashioned Potato Pie
- BOIL POTATOES UNTIL FALL-APART: I learned this the hard way—undercooked potatoes turn to mush in the pie, and nobody wants that. Boil your Russets until a knife slides in like butter, not like you’re fighting a stubborn vegetable. A fork should crumble them easily; if it doesn’t, they need more time.
- CHILL THE DOUGH 30 MINUTES: This isn’t the prettiest method, but it’s the tastiest. The butter in your all-purpose crust needs time to firm up, or it’ll melt into a greasy mess when you roll it out. Pop that dough in the fridge while you prep the filling—yes, even if you’re impatient like me.
- SALT THE POTATO WATER: Skip this, and your potatoes will taste bland no matter how much salt you add later. Generously salt the boiling water (about 1 tablespoon per gallon) so the starch absorbs flavor. It’s the thing that matters most when you’re peeling them later.
- MAKE CRUST IN BURSTS: Resist the urge to mix the butter and ice water all at once—it’ll turn to soup. Cut the cold butter into the flour in small batches, tossing with a fork or your fingers until you see pea-sized crumbs. This guarantees a flaky crust, not a dense brick.
Pro cooking tips for this recipe
Blind-Baking Secret
To prevent a soggy bottom crust, I swear by blind-baking the first layer for 15 minutes at 375°F before adding the filling. Line the crust with parchment paper, fill with dried beans or pie weights, and bake until lightly golden.
This creates a sturdy base that holds up beautifully under the creamy potato filling. 💫
Filling Consistency
The filling must be thick but pourable—think of it like a rich mashed potato consistency. If it’s too thin, add 1-2 tablespoons of cornstarch mixed with cold water. Too thick?
Stir in 1-2 tablespoons of heavy cream to loosen it. The eggs are key here: beat them separately and fold them in last to keep the filling light and airy.
Lattice Mastery
For that classic lattice look, cut the second dough disc into strips about ½-inch wide and weave them in a crisscross pattern over the filling. Brush the strips with beaten egg before baking for a golden finish.
Leave the center open—this allows steam to escape, preventing a soggy crust. I like to overlap the strips slightly for extra visual appeal.
Oven Thermometer Check
Ovens run hot or cold, and potato pie is no place for guesswork. I always use an oven thermometer to confirm my oven reaches 375°F. If your oven runs hot, reduce the temperature to 350°F to avoid over-browning the crust.
A perfectly baked pie should have a deep golden crust and a filling that’s just set in the center.
Resting for Perfection
Patience is key—let the pie cool completely for at least 2 hours before slicing. This resting time allows the filling to firm up and the flavors to meld together.
If you can’t wait, chill it in the refrigerator for 1 hour to speed up the process. Trust me, the wait is worth it for that creamy, velvety texture.
Reheating Leftovers
If you have leftovers, reheat them gently to preserve that creamy texture. Cover the pie with foil and warm it in a 300°F oven for 15-20 minutes.
For a quick fix, microwave individual slices for 30-45 seconds on medium power. Avoid high heat—it can make the filling dry out or the crust turn tough.
Nutrition facts
Frequently asked questions
Can I make this potato pie ahead of time?
This pie tastes even better the next day as the flavors meld together. Assemble the pie up to 24 hours ahead and refrigerate uncovered. Bake it straight from the fridge, adding 5-10 minutes to the baking time. For best results, bake it 4-6 hours before serving to let the crust crisp up.
What's the secret to a flaky crust?
The key is keeping the butter cold and handling the dough as little as possible. Use ice water to bind the dough and avoid overworking it. Chill the dough for at least 1 hour before rolling, and never let it warm up while handling. This creates those perfect flaky layers!
Can I use sweet potatoes instead of russets?
While russet potatoes are traditional, you can substitute sweet potatoes for a different flavor profile. Use the same quantity, but reduce the sugar to 0.5 cup since sweet potatoes are naturally sweeter. The texture will be slightly denser, but it still makes a delicious pie. For best results, roast the sweet potatoes first for extra flavor.
Why did my pie filling get watery?
This usually happens when the filling is too thin or the pie isn't baked long enough. The filling should be thick but pourable—like rich mashed potatoes. If yours was too thin, stir in 1-2 tablespoons of cornstarch mixed with cold water. Also, ensure the filling reaches 170°F internally before removing from the oven.
How do I store leftovers?
Store leftovers in an airtight container in the refrigerator for up to 4 days. For longer storage, wrap individual slices in plastic wrap and freeze for up to 3 months. Thaw overnight in the fridge before reheating.