Snacks
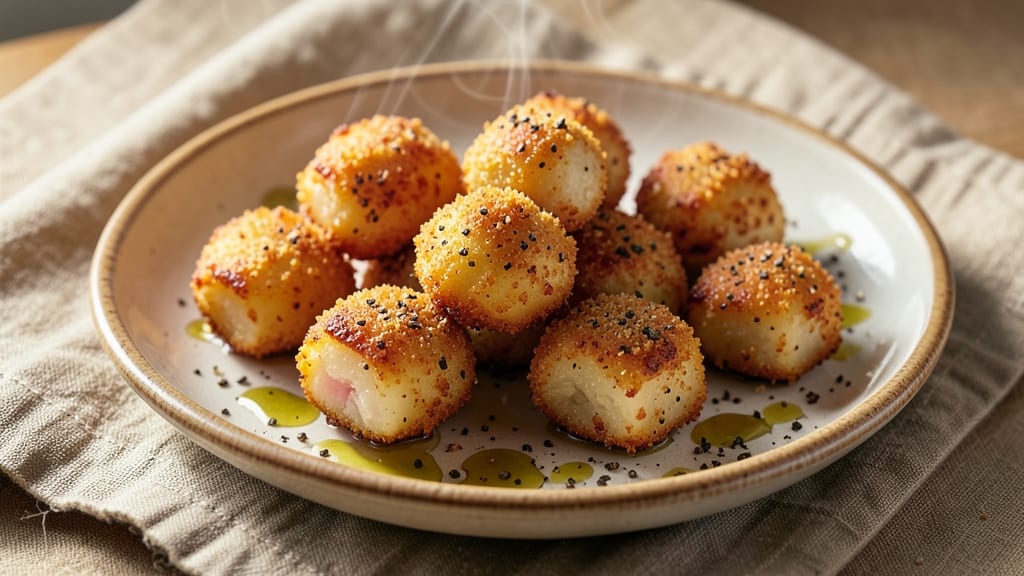
Crispy garlic potato pops transform humble spuds into addictive, golden bites that disappear faster than you can say "garlic aioli."
Standing on a step stool in my grandmother’s kitchen in Sicily, I first learned how to turn simple potatoes into something irresistible—now I’m sharing the foolproof method that delivers crispy edges every time, whether you bake or air fry. The secret?
Cornmeal crowns that lock in moisture while creating that perfect crunch.
This recipe delivers restaurant-quality results with just five ingredients and 30 minutes of hands-on time. You’ll start with baby potatoes cut into even bite-sized pieces, then coat them in a mix of cornmeal and garlic powder for that signature tang.
High heat—either in the oven or air fryer—transforms them into golden, crispy morsels with a tender center, ready to be dipped in cool garlic aioli or tangy ranch.
The best part? These potato pops are impossible to mess up—they’re forgiving with temperature and timing, yet still pack serious flavor. That garlicky tang from the seasoning blends perfectly with the crispy exterior, creating a snack that’s both satisfying and elegant.
Serve them at game day gatherings or as an appetizer that’ll have everyone reaching for seconds.
For extra flair, sprinkle with fresh parsley or a pinch of red pepper flakes before serving. Whether you’re feeding a crowd or craving a crispy snack, this recipe delivers crispy, garlicky perfection that’s worth every bite. Let’s get cooking!
Ingredients for garlic potato pops
Five ingredients. One golden, garlicky transformation. That's all you need for crispy perfection.
| Ingredient | Amount | Notes |
|---|---|---|
| Baby Potatoes 🥔 | 1 ½ lb | Yukon gold or red preferred |
| Cornmeal 🌾 | ½ cup | Fine grind for even coating |
| Garlic Powder 🧄 | 2 tbsp | Freshly ground preferred |
| Olive Oil 🫒 | 2 tbsp | Light, not extra-virgin |
| Salt 🧂 | 1 ½ tsp | Kosher or sea salt |
| Black Pepper 🌶️ | ½ tsp | Freshly cracked for bite |
| Fresh Parsley 🌿 | ¼ cup | Chopped for garnish (optional) |
| Red Pepper Flakes 🔥 | ½ tsp | For heat (optional) |
The potatoes are non-negotiable—baby Yukon golds or reds cut into even 1-inch pieces are your best bet. Trader Joe's or the produce section at Whole Foods usually have them pre-washed and ready to go. If you can't find baby potatoes, regular russets work too—just cut them into smaller, uniform cubes. The cornmeal is key here; Bob's Red Mill fine grind is my go-to because it coats the potatoes evenly without clumping. Skip the pre-mixed seasoning packets—they’re full of anti-caking agents that’ll ruin the crisp. Freshly ground garlic powder makes all the difference, so if you’ve got a spice grinder, toast the garlic first for even more depth.
No cornmeal? All-purpose flour or panko works in a pinch, but the texture won’t be quite as crispy. Running short on garlic powder? Fresh minced garlic at half the amount adds a whole new level of flavor, but it’ll turn the potatoes slightly softer. Olive oil is just for tossing—don’t skimp on the light variety, as extra-virgin can make the coating too greasy. For extra flair, toss in a pinch of smoked paprika with the garlic powder for a subtle smoky kick. The parsley and red pepper flakes are totally optional but add that restaurant-worthy touch—garnish right before serving so they stay vibrant.
These keep surprisingly well—3 days in the fridge if you can resist eating them all at once. Reheat in the oven at 400°F for 5-7 minutes until crispy again. For meal prep, store in a single layer on a wire rack in the fridge so they don’t get soggy. Freeze them raw for up to 2 months—just toss them in the air fryer straight from frozen at 375°F for 12-15 minutes, shaking the basket halfway. Pro tip: Make a double batch—they’re that good.
Why You'll Love This Recipe
- No Chopping Needed: I swear by these because baby potatoes stay whole—no peeling, no dicing, just a quick boil. The cornmeal coating sticks like glue, so they hold their shape even when I toss them in the oven.
- Crispy-Garlic Magic: That first bite? Crunchy outside, fluffy inside, with garlic powder kissing every corner. Honestly, I’ve tried fancier seasonings, but this combo is my go-to—simple but dangerously good.
- Game for Any Meal: Serve them as a snack with beer, a side with steak, or even a topping for soup. I’ve reheated them cold from the fridge, straight from the oven, and they’re just as addictive each time.
- Budget-Friendly Staple: Baby potatoes and cornmeal won’t break the bank, and a single batch stretches across lunches, dinners, and snack attacks. Between us, I’ve fed a crowd for under $10 with these—no one ever complains.
Step-by-step instructions for garlic potato pops
Here's how to transform simple baby potatoes into irresistibly crispy, garlicky bites.
Prep and Parboil the Baby Potatoes
Start by thoroughly rinsing the 1.5 lb baby potatoes under cold water to remove any dirt or debris. You want them completely clean since they'll be sitting in boiling water. Place them in a medium pot and cover with cold water by about 1 inch.
Bring the water to a boil over medium-high heat, then reduce to a gentle simmer. Cook the potatoes for 8-10 minutes until they're fork-tender but still hold their shape. You'll know they're ready when a knife slides in easily but the insides don't fall apart. Drain immediately in a colander and let them cool for 5 minutes before handling.
Create the Crispy Cornmeal Coating
While the potatoes cool, combine the 0.5 cup cornmeal, 2 tbsp garlic powder, 1.5 tsp salt, 0.5 tsp black pepper, and 0.5 tsp red pepper flakes in a large bowl. Mix thoroughly with a whisk or fork to distribute the seasonings evenly. This blend is what will give your potato pops their signature garlicky kick and satisfying crunch.
Once the potatoes are cool enough to handle, gently pat them dry with paper towels. This step is crucial—any moisture left on the potatoes will prevent the cornmeal from adhering properly. You want them completely dry before moving to the next step.
Coat and Bake for Perfect Crispiness
Heat your oven to 425°F and line two baking sheets with parchment paper. Working in batches, toss the potatoes with the cornmeal mixture in the bowl, coating each potato thoroughly. You'll need to use your hands to ensure every nook and cranny gets covered—this is what creates that satisfying crunch when you bite in.
Arrange the coated potatoes in a single layer on the prepared baking sheets, leaving about 1 inch between each potato. This spacing allows for proper air circulation, which is essential for even browning. Drizzle the potatoes with the 2 tbsp olive oil and toss gently to distribute evenly.
Bake Until Golden and Crispy
Bake the potatoes for 25-30 minutes, flipping them halfway through, until they're golden brown and crispy all over. You're looking for that perfect balance where the exterior is crisp and the interior is still tender. If you notice they're browning too quickly, tent the baking sheets with foil to prevent burning.
During the last 5 minutes of baking, sprinkle the chopped 0.25 cup fresh parsley over the potatoes for a pop of color and freshness. The parsley adds a nice visual contrast to the golden-brown potatoes and brings a bright, fresh element to balance the garlicky flavor.
Serve Immediately While Crispy
Remove the potatoes from the oven and let them cool on the baking sheets for 2-3 minutes—just enough time to firm up slightly but still maintain that perfect crunch. Serve them immediately while they're at their crispiest. These potato pops are best enjoyed right out of the oven when the coating is still crunchy and the insides are warm and tender.
For an extra garlicky kick, serve with a side of garlic aioli or a sprinkle of additional red pepper flakes. The contrast of the crispy exterior with the soft, garlicky interior makes these potato pops irresistible as an appetizer or snack.
Pro Tips For Making Garlic Potato Pops
- PARBOIL FIRST: Toss the baby potatoes in boiling water for 3-4 minutes before baking—this guarantees they finish cooking evenly and don’t turn to mush. I learned this the hard way after serving underdone centers that tasted like glue.
- DON’T SKIMP CORNMEAL: Use about ¼ cup cornmeal per pound of potatoes, pressed firmly into the crevices. The extra effort keeps them crispy instead of soggy. (Yes, it’s messy, but your future self will notice.)
- HIGH HEAT, THEN LOW: Start them at 425°F for 15 minutes to brown the cornmeal, then drop to 375°F to finish. The two-stage bake prevents burning while ensuring a deep, garlicky crust.
- SALT THE OIL: Mix the olive oil with 1 tsp salt before tossing—it seasons the coating better than sprinkling later. I was skeptical until I tried it: the flavor sticks to every nook.
Dietary considerations for this recipe
Gluten-Free Adaptation
Skip the cornmeal and use certified gluten-free all-purpose flour or almond flour instead—both create a crispy coating without gluten. I’ve tested Bob’s Red Mill 1:1 gluten-free flour and it works beautifully.
Just mix ½ cup flour with 1 tsp xanthan gum (if your blend doesn’t include it) to mimic cornmeal’s texture. Toss the potatoes in this dry mix just like the original recipe. 🌾
Low-Carb/Keto Version
For a keto-friendly twist, swap cornmeal for crushed pork rinds—they’re gluten-free, low-carb, and add incredible crunch. Toss the potatoes in ½ cup crushed pork rinds mixed with 2 tbsp garlic powder and ½ tsp onion powder.
Air fry at 375°F for 12-15 minutes instead of baking for extra crispiness. Pair with a cream cheese garlic dip for the ultimate low-carb snack. 🥔
Dairy-Free Option
If you’re avoiding dairy, skip the garlic aioli and opt for a garlic yogurt dip using unsweetened coconut yogurt instead of sour cream. Mix ½ cup coconut yogurt with 1 tbsp minced garlic, 1 tsp lemon juice, and a pinch of salt.
The tangy, creamy dip complements the crispy potatoes perfectly without any dairy. ✨
Allergen-Friendly Tips
For nut allergies, avoid almond flour and stick with certified gluten-free cornstarch (like Arrowhead Mills) instead of cornmeal. Double-check all spice blends for hidden allergens—Penzeys brand is a safe bet for pure, single-ingredient seasonings.
Always read labels on garlic powder, as some brands process in shared facilities with nuts or dairy.
Vegan-Friendly Swaps
Use nutritional yeast (instead of garlic powder) for a cheesy, garlicky flavor—2 tbsp adds depth without dairy. Replace olive oil with avocado oil for a neutral base. For crispiness, coat potatoes in chickpea flour (besan) mixed with 1 tsp smoked paprika and ½ tsp turmeric for color.
Bake as directed, but increase time to 35 minutes for extra crispiness. 🌱
Nutrition facts
Frequently asked questions
Can I use regular potatoes instead of baby potatoes?
Yes, but you'll need to cut them into 1-inch cubes for even cooking. Russet potatoes work well—just make sure to parboil them for 12-15 minutes to ensure they're fully tender before coating. The smaller size helps them crisp up faster and more evenly.
Why do my garlic potato pops turn out soggy?
Soggy pops usually mean moisture got trapped in the coating. Always pat the potatoes completely dry after parboiling, and don't overcrowd the baking sheets. For extra crispiness, spread them in a single layer with 1 inch between each piece. Air frying at 375°F for 12-15 minutes also delivers better crunch than baking.
What's the best way to reheat leftover garlic potato pops?
Spread them on a baking sheet and reheat at 400°F for 5-7 minutes until crispy again. For air fryer reheats, cook at 375°F for 4-5 minutes, shaking the basket halfway. Avoid microwaving—they'll steam instead of crisp up. Store in a single layer on a wire rack to maintain texture.
Can I make these ahead of time?
Yes! Make them up to 3 days ahead and store at room temperature in an airtight container. For longer storage, freeze raw-coated potatoes for up to 2 months. Thaw in the fridge overnight before reheating. The flavor actually improves after resting for 24 hours.
What's the secret to extra crispy garlic potato pops?
Three things: thorough drying after parboiling, even coating with cornmeal, and proper spacing on the baking sheet. For maximum crunch, use fine-ground cornmeal and bake at 425°F with the oven rack positioned in the middle. A quick spray of olive oil before baking helps too!